Building a Linux "Steam Machine"
Around 2 weeks ago, Valve Software announced their Steam Machine. It’s a whole gaming PC stuffed into a tiny 6-inch cube. It’s running SteamOS, which is Valve’s Arch-based Linux distro built for PC gaming. And it’s specifically targeted at users who want to play games on their TV.
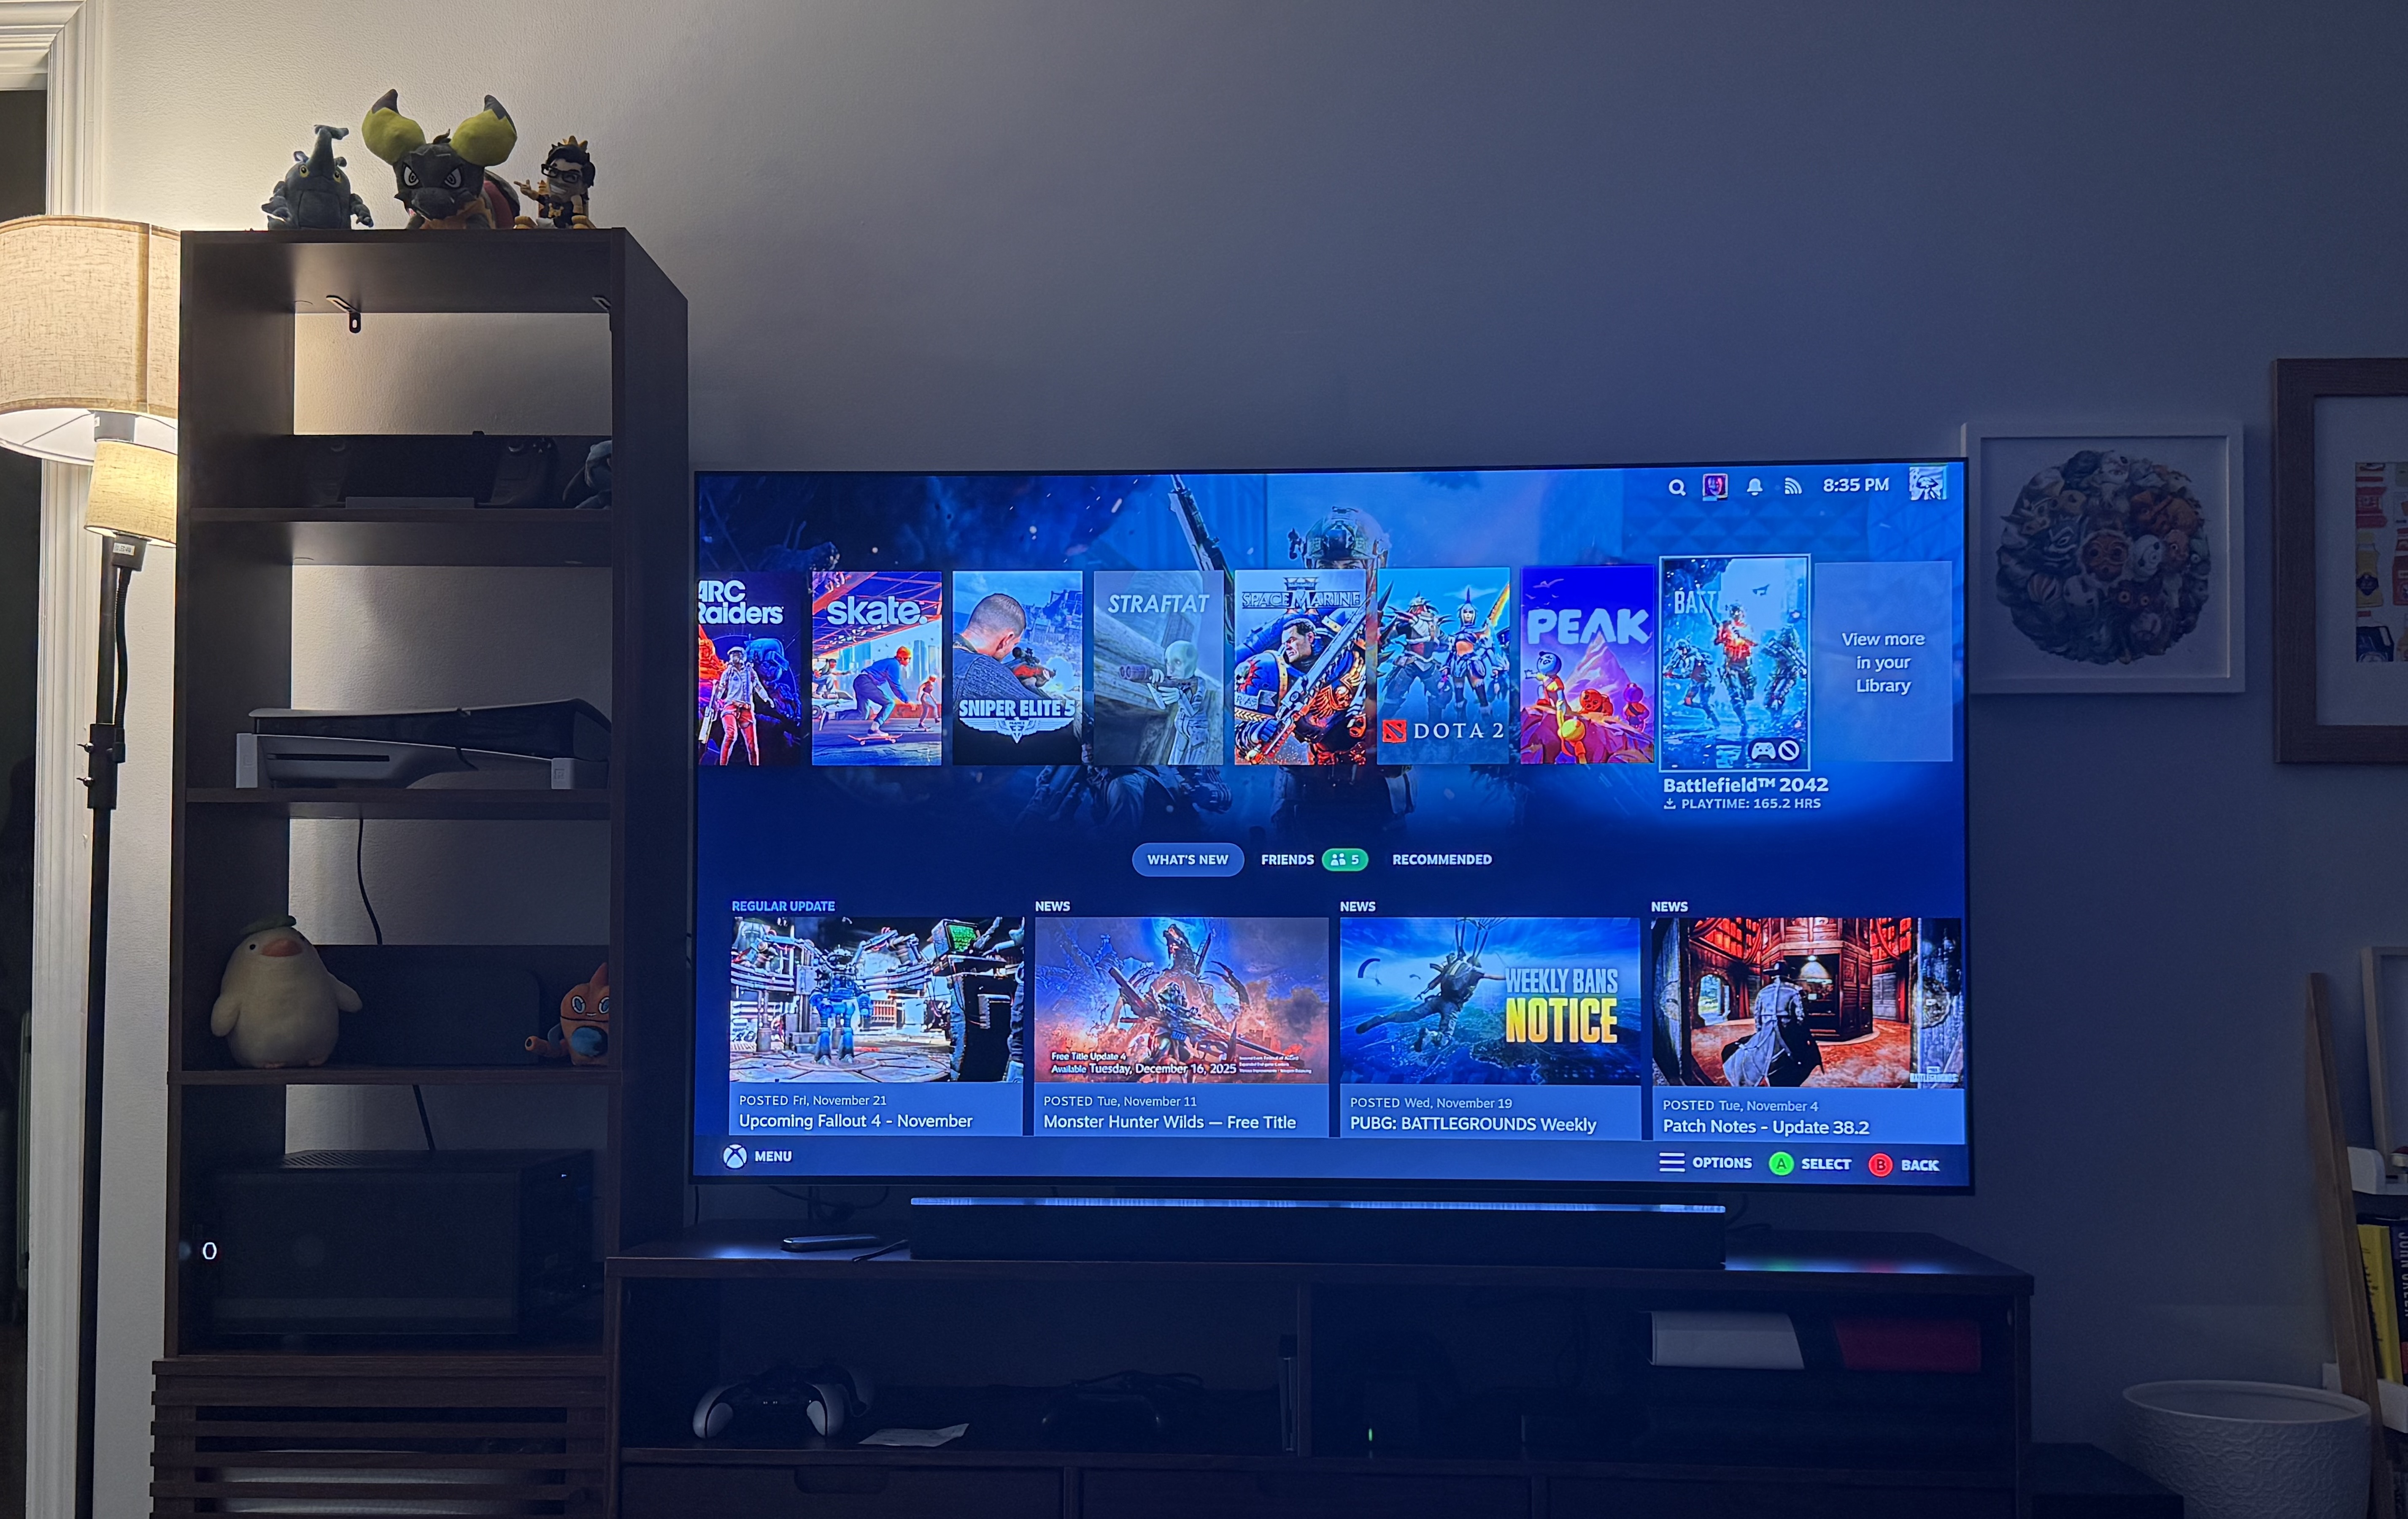
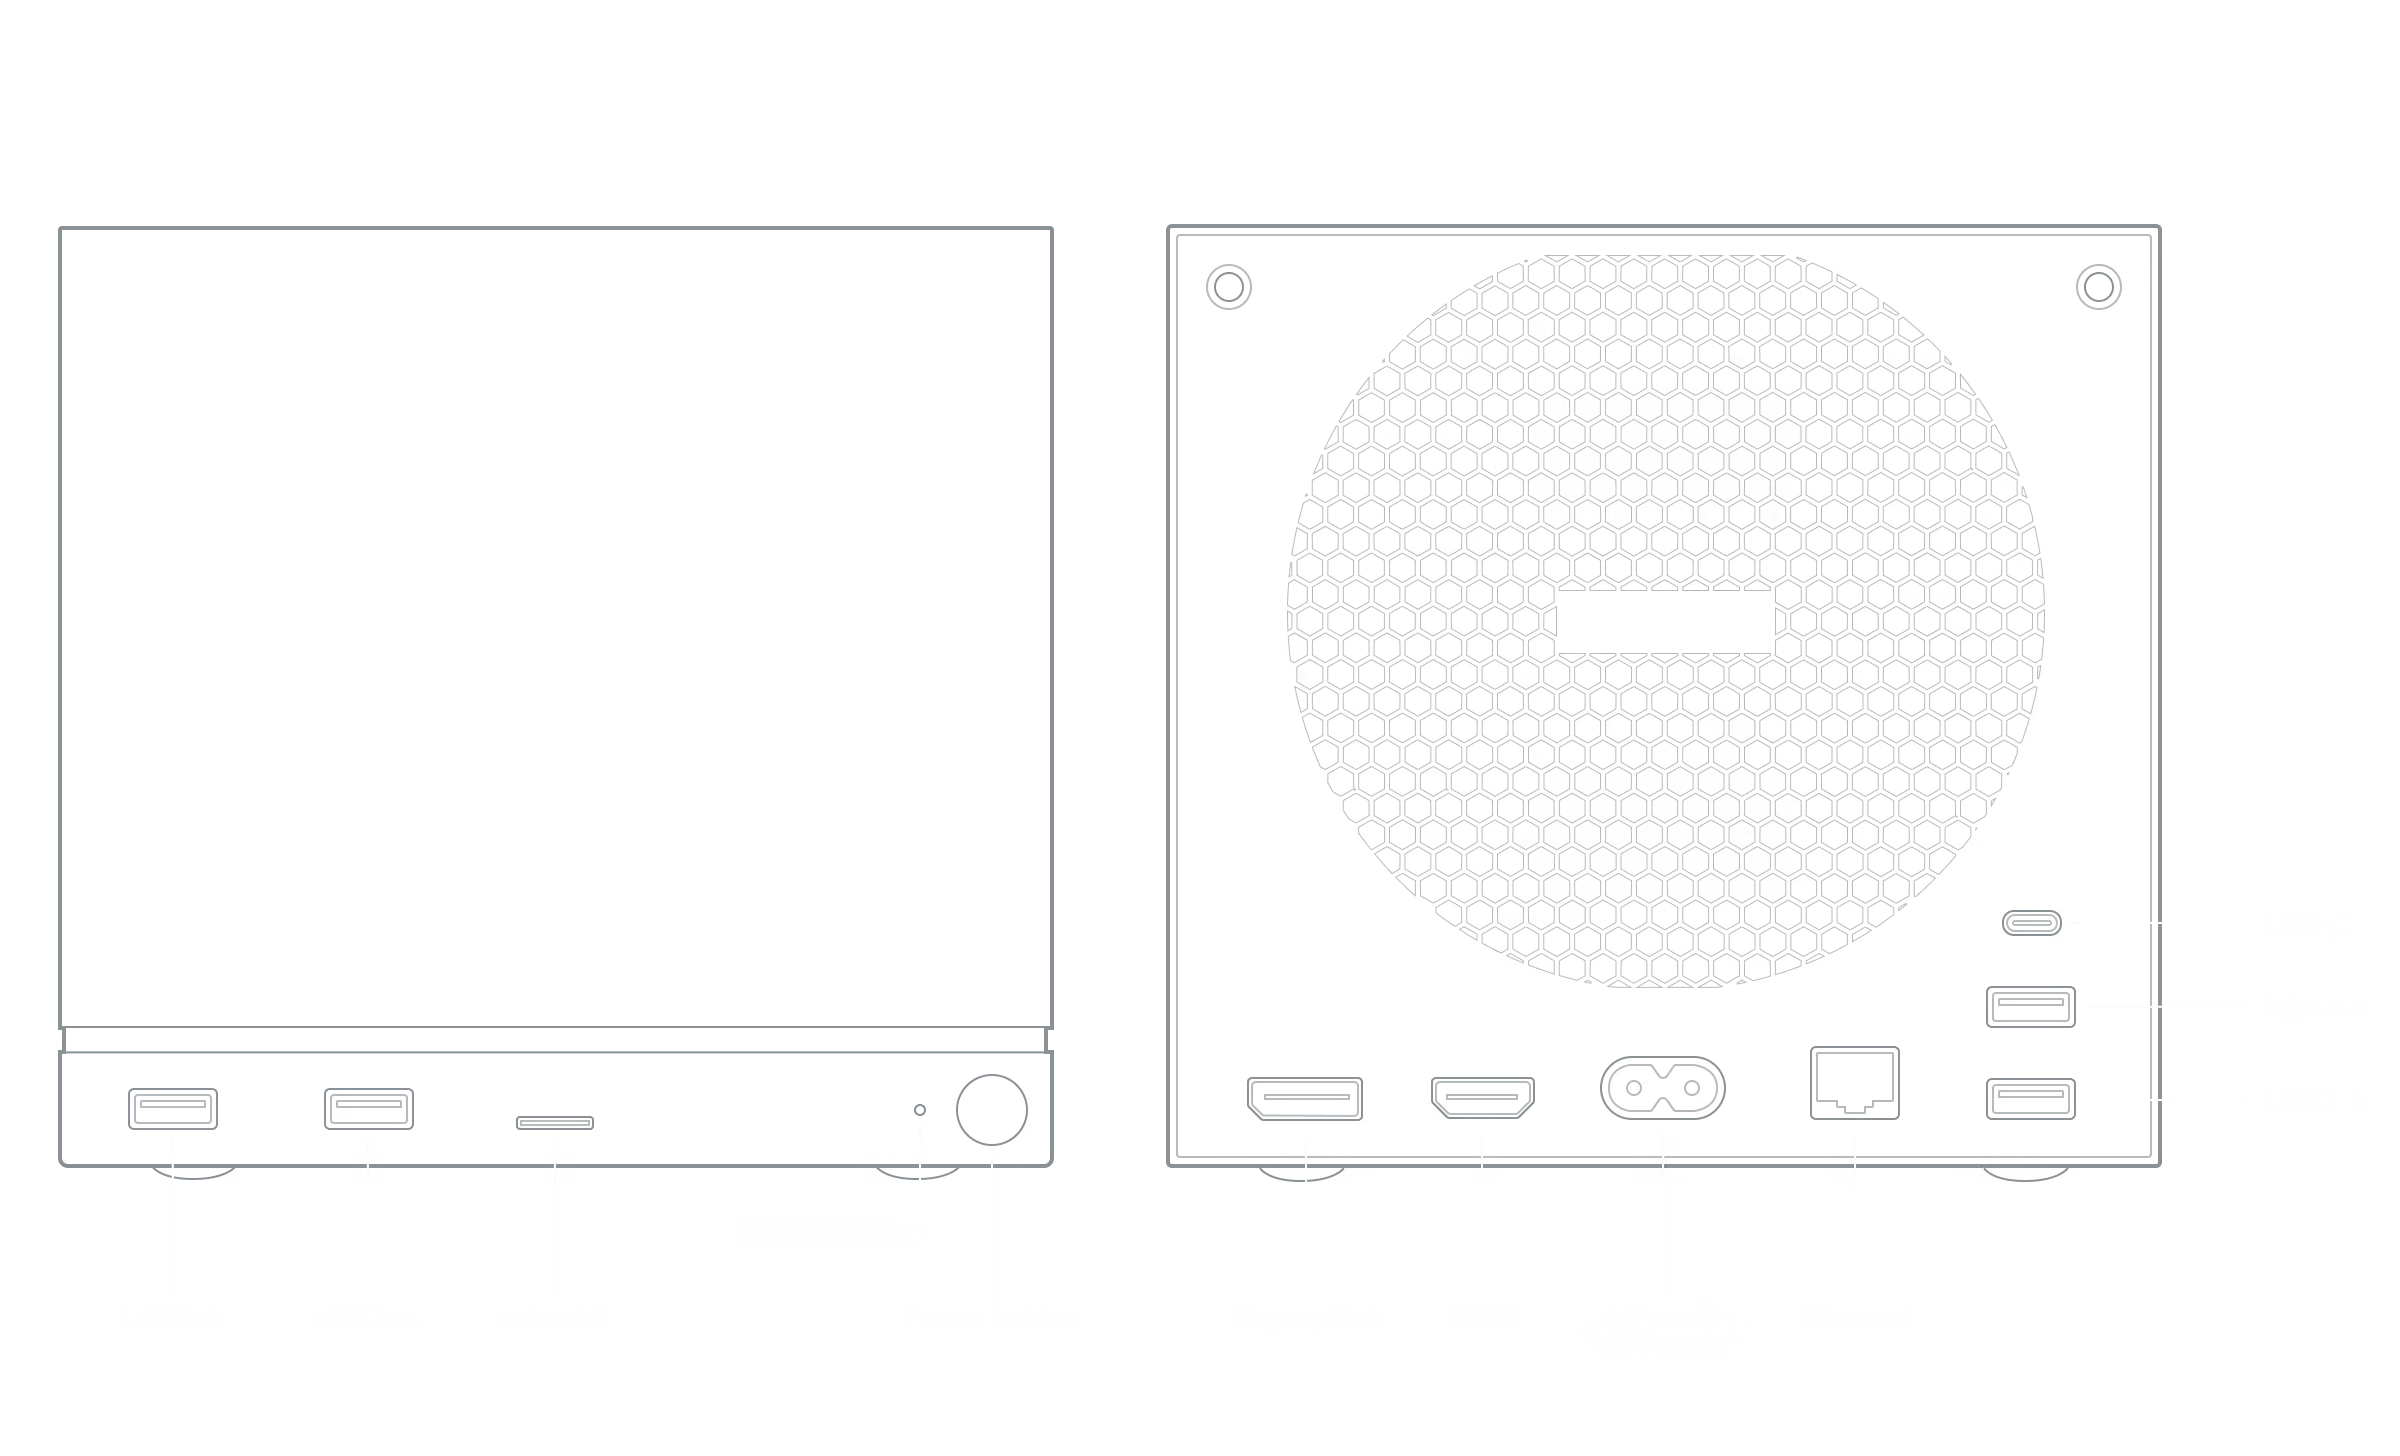 Image courtesy of Valve Software
I fall directly into their target audience, so I obviously love this idea. I have a Steam Deck docked to my TV for gaming on the couch. It works alright, but switching between handheld mode and docked mode can be finicky. And the Steam Deck isn’t designed to drive the 4k TV I’ve got in my living room.
The Steam Machine has a beefier CPU and GPU than the Deck; Valve says the device is “six times more powerful,” whatever that means. They also claim that it can run at 4k/60fps with FSR, which is AMD’s AI upscaling tech. All while fitting under my TV stand. When I first heard all this, I had a “shut up and take my money” moment.
However, Valve has stated that the Steam Machine will be priced more like an entry-level PC than a console. I interpret this as falling in the $700-$800 range. I’ve also heard its GPU performance is similar to AMD’s RX 7600, which is not a particularly high-end part. It only has 8GB of VRAM, which is a little light in 2025. It’s also using AMD’s RDNA3 architecture, which doesn’t have default access to the latest FSR4 upscaling tech. Additionally, both the CPU and GPU aren’t user-replaceable, because they are soldered to the motherboard. Having such a tightly integrated design certainly helps with the small size, but it also means repairs and upgrades are less realistic. I don’t really want to shell out 800 bucks for that sort of package.
I still think the device is an awesome concept though, and I’m a big fan of Valve and their products. For most folks who want a compact gaming PC, even $800 for such a sleek solution is compelling. But when it comes to computers I’m not like most people, because I hoard hardware for no good reason. So I figure I can cobble together my own Steam Machine, with some pretty sweet hardware, and spend less than I would have on Valve’s shiny new cube.
Goals
I’ll start with a rubric. What do I want out of my Steam Machine?
-
Plays games at 1080p, ultra settings, 120fps. My TV runs at 4k/120hz, which even the most powerful gaming PCs will struggle to drive natively. I won’t even bother trying that on a budget machine. However, 1080p scales up to 4k quite well, because it’s exactly 1/4th the number of pixels. You can just convert each 1080p pixel to a 2x2 square on the 4k panel, and it will still look great. Modern TVs even have upscalers built in for exactly this use case.
-
Runs Linux. I am trying to keep the number of Windows devices in my house to a minimum, and I want to support the efforts of folks making Linux gaming possible. Windows is still a requirement for some multiplayer games with anti-cheat software, but I’ve got a separate machine in my office for those.
-
Repairable. If the machine dies, I’d prefer to fix it myself with EBay and elbow grease. I’d rather not deal with mailing in proprietary hardware for servicing. For a budget build, that means using last-gen parts. While that limits your upgrade path, it also means that there’s plenty of supply on the used market. Given that I’m targeting 1080p, which hasn’t been state-of-the-art for at least a decade, I’m fine with prioritizing repairs over upgrades.
-
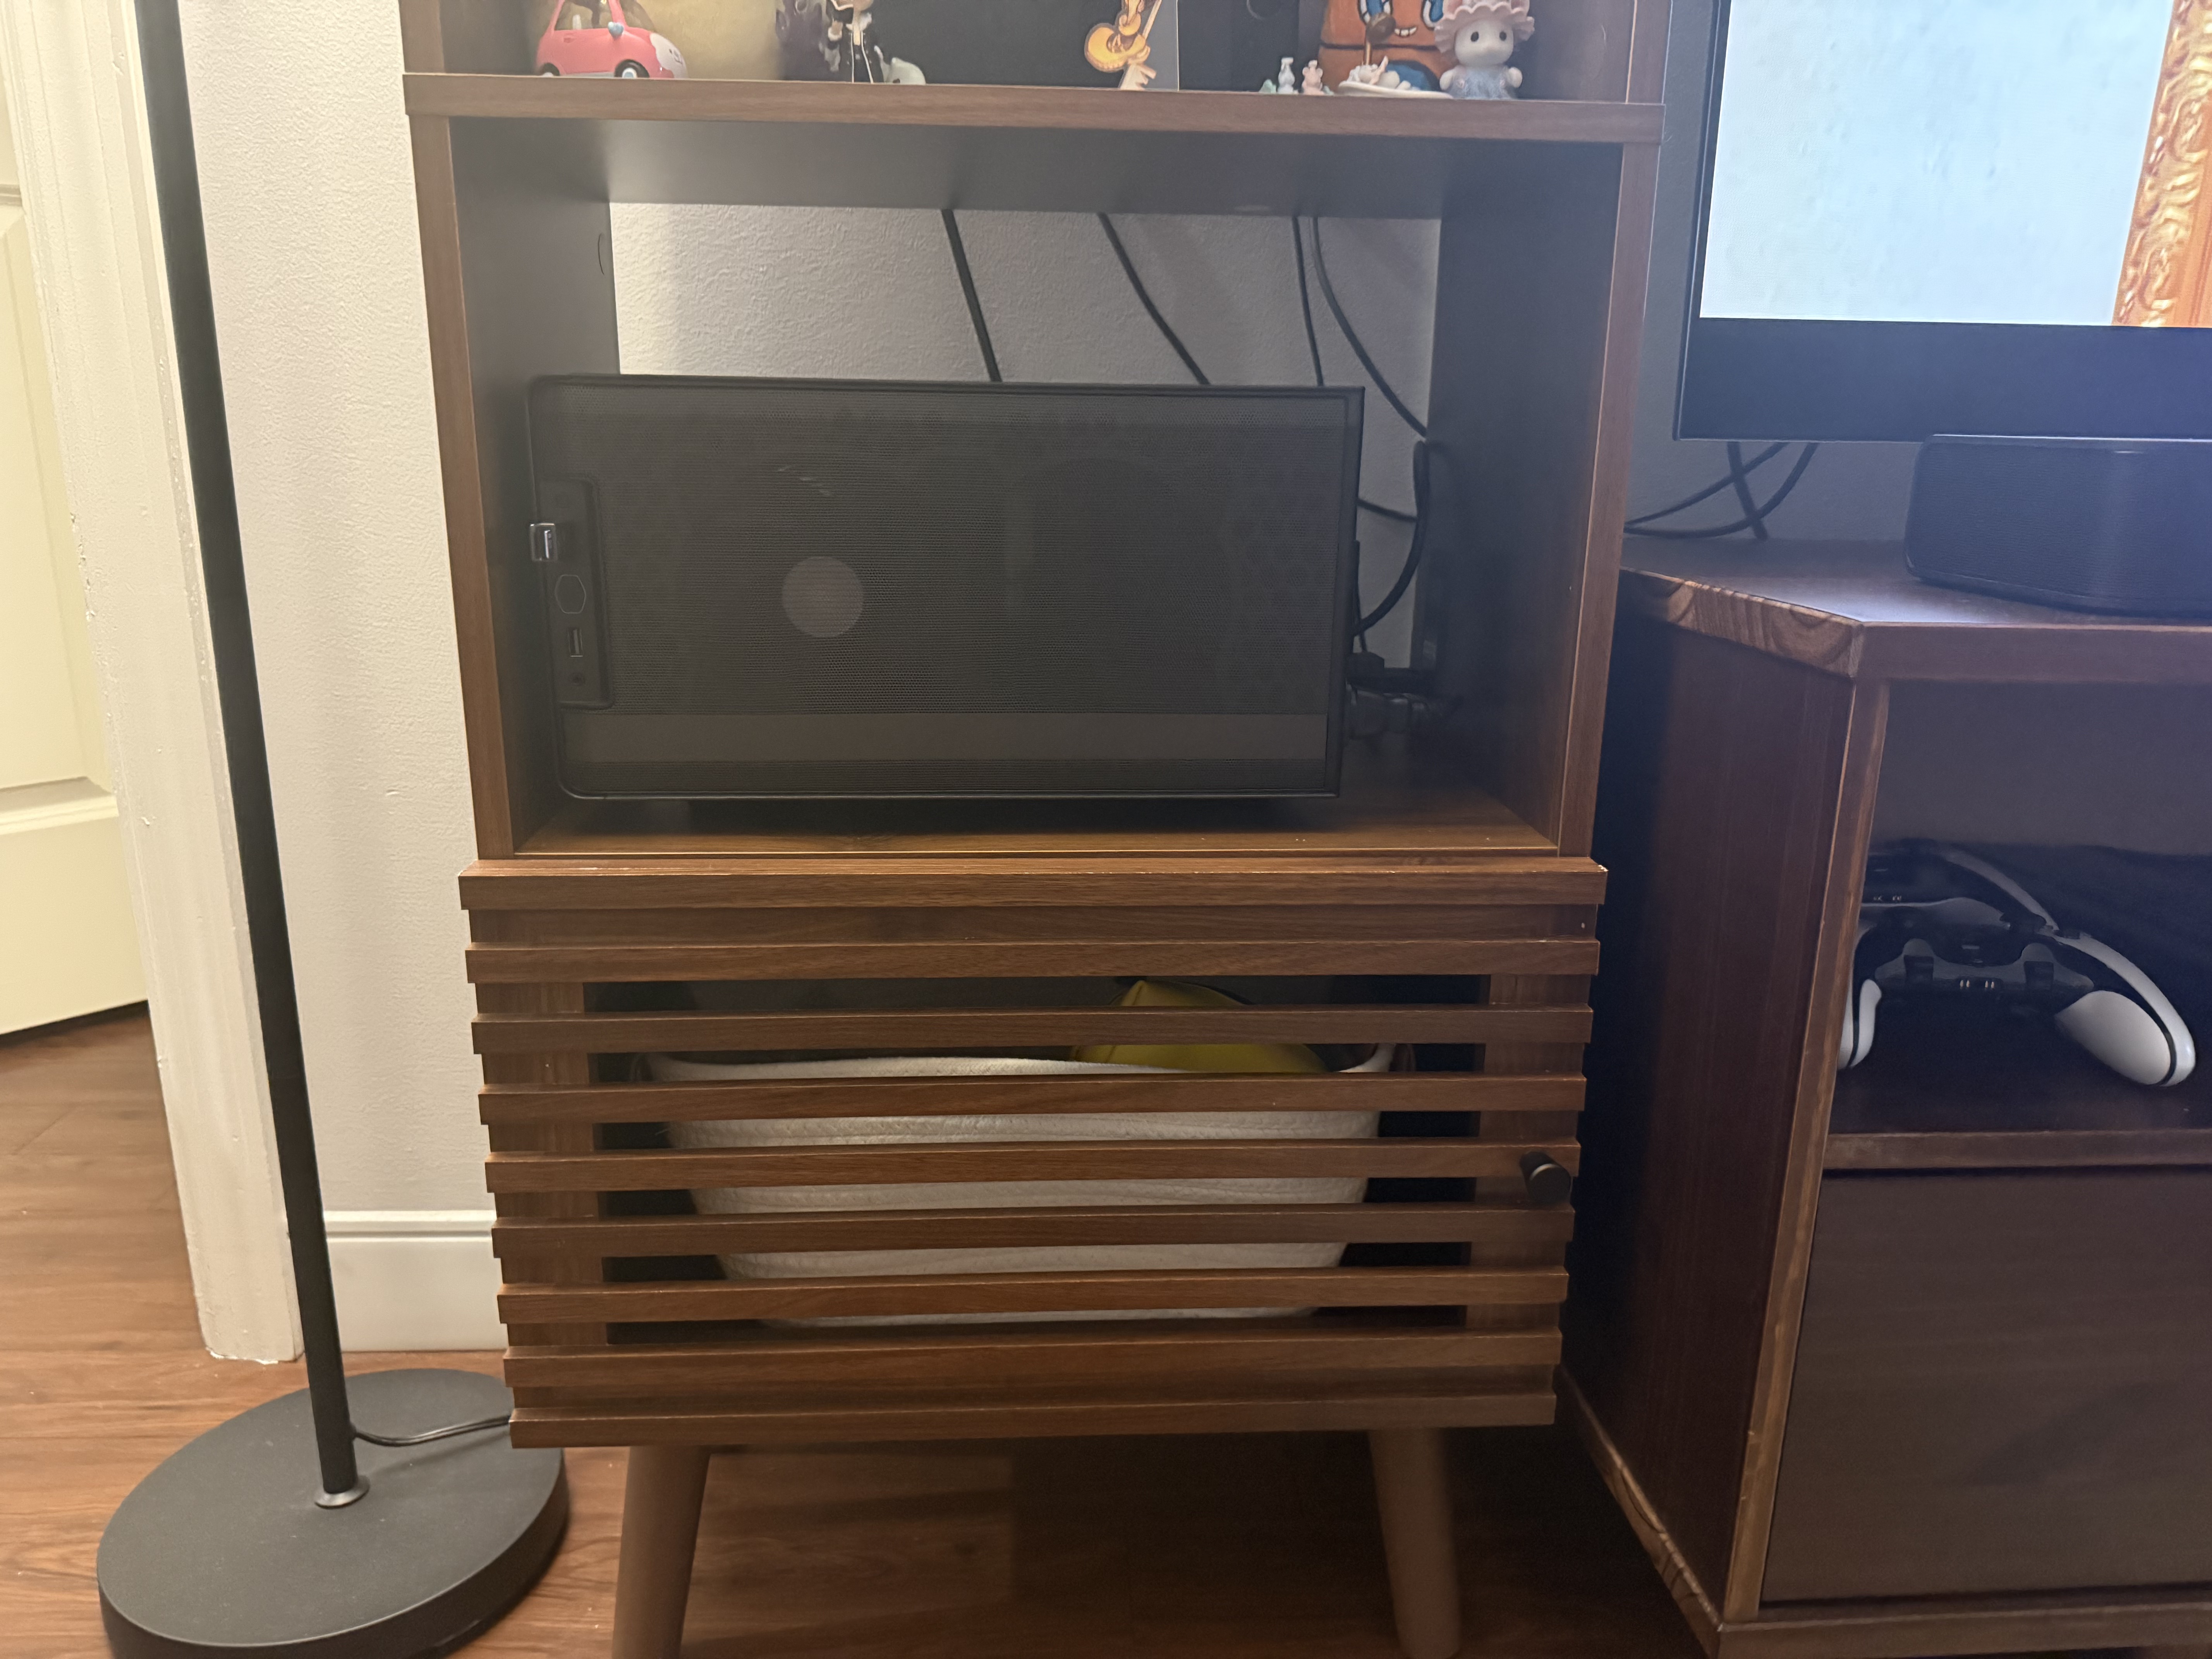
Compact. It doesn’t need to be pretty, but it does need to look at home next to my TV.
-
Contains <$800 of parts purchased specifically for this build. Meaning, I want to spend less to get this running than I’d pay Valve.
Initial Hardware
For this machine, I’m going all AMD. They make great gaming CPUs, and their GPU drivers are available by default on most Linux distros, which makes compatibility and setup a breeze. The GPUs lag behind Nvidia on some of the AI features, but in terms of raw rasterization they tend to provide better performance per dollar. Great for a budget-focused build.
I hinted at this previously, but most of my savings will come from re-using older hardware I have on hand. Here’s what I pulled out of the pile:
-
CPU: Ryzen 5900X. It’s a couple generations old, but the 5000-series AM4 CPUs are still plenty relevant today. This thing is 12-core/24-thread, way overkill for what I’m trying to do here. But it’s gathering dust, so I might as well put it to work.
-
CPU Cooler: Noctua L9x65. This is the only part I’m a little dubious about. It’s not really intended for high-power CPUs. But if I run the CPU in ECO mode it’s probably fine?
-
RAM: 32GB DDR4-3200. Nothing to write home about here, RAM is RAM :)
-
Case: Silverstone Something-Or-Other. I snagged this case from a coworker pre-Covid, and it’s so old it has a Windows 7 product key stuck to the back. I am pretty sure it’s the SG05. It’s small, it fits all my parts, and black goes with everything, so it’ll be at home in my living room.
-
Storage: SK Hynix P41 Platinum, 512GB. I grabbed a bunch of these a while ago to keep on hand for projects. Good quality Gen 4 NVMe drive on the cheap. This is probably the first part I’d want to upgrade in the future, given how large game installs are nowadays.
-
Power Supply: EVGA 550w SFX. At 550 watts it’s a little low for a modern gaming PC, but it should provide enough juice for my 1080p aspirations.
-
Fan: Be Quiet! Pure Wings 120mm. Notice this says “fan”, singular, because the Silverstone case has exactly one spot to mount a fan. Let’s hope that’s enough!
The only things I need to buy are a motherboard, and the all-important GPU. Let’s go over my picks:
-
Motherboard: ASRock B550m-ITX/ac. It’s 90 bucks, what more could I ask for? ASRock makes decent AM4 boards, and this one has everything I need and nothing I don’t. A single x16 PCIe slot for the graphics card, a single NVMe slot for my storage drive, and some USB ports for controllers and peripherals. Actually, it has one weak point, which is that it only supports WiFi 5. I can fix this for $60 with a Netgear A8000, which has in-kernel drivers that make it plug-and-play on Linux. Gaming tends to be best on wired internet anyway, but getting my living room wired up is still on the to-do list.
-
GPU: PowerColor Reaper 9060 XT 16GB. The GPU makes or breaks the gaming experience, so this is the most important choice for the build. I think this card will be (almost) perfect. It should crush 1080p 120fps in less demanding games, and it’s got 16GB of VRAM and FSR4 support, which provide extra headroom for running games on ultra settings. More demanding games should still run at a stable 60fps, and we can turn on AI frame generation if we want a boost for newer titles. To guarantee 120fps on ultra settings all the time, we’d need to shell out more on the GPU and upgrade the power supply, which will stretch the budget uncomfortably close. This card is a svelte 2 slots thick and only has 2 fans, so it will fit in my small case with room to spare. It’s also well within my power budget. It costs $350, which means it’s the most expensive part of the build, but it’s still very much on the low end of the GPU price spectrum.
FINAL PRICE: $500. We’re well within budget, and we got as close as possible to our hardware requirements: 1080p ultra performance up to 120fps, small size, and standard PC components that are easy to source for repairs.
Software
Thanks to Valve’s investments in SteamOS and its open-source Proton compatibility layer, gaming on Linux is the best it’s ever been.
Proton lets you game on any Linux distro nowadays. Just install Steam from your package manager and you’re good to go. However, some distros specifically cater to the couch gaming experience, and those will make the most sense for our build.
The most obvious option would be to install Valve’s SteamOS. Technically it’s not certified for general installation. If you’re feeling brave you can download the Steam Deck recovery image and install it on any all-AMD machine. But, I don’t want to spend time troubleshooting an OS that is not in its happy place. I Just Want To Play Video Games. So I’m going to try something else.
I’m going to install Bazzite instead. It’s based on Fedora, while SteamOS is based on Arch. However, it still includes SteamOS’s awesome console-like UI, bundles some cool gaming extras like Lutris, and runs on everything from handhelds to desktops.
I’ll be using the bazzite-deck image, which defaults to the SteamOS-console-style UI on boot.
(Side note: for folks interested in other gaming-first Linux distros, check out CachyOS, Garuda, or Nobara.)
Putting It All Together
I’m sure there’s plenty of blogs out there about building a computer, so we’ll skip to the good part. Here’s what it looks like (internally) assembled:
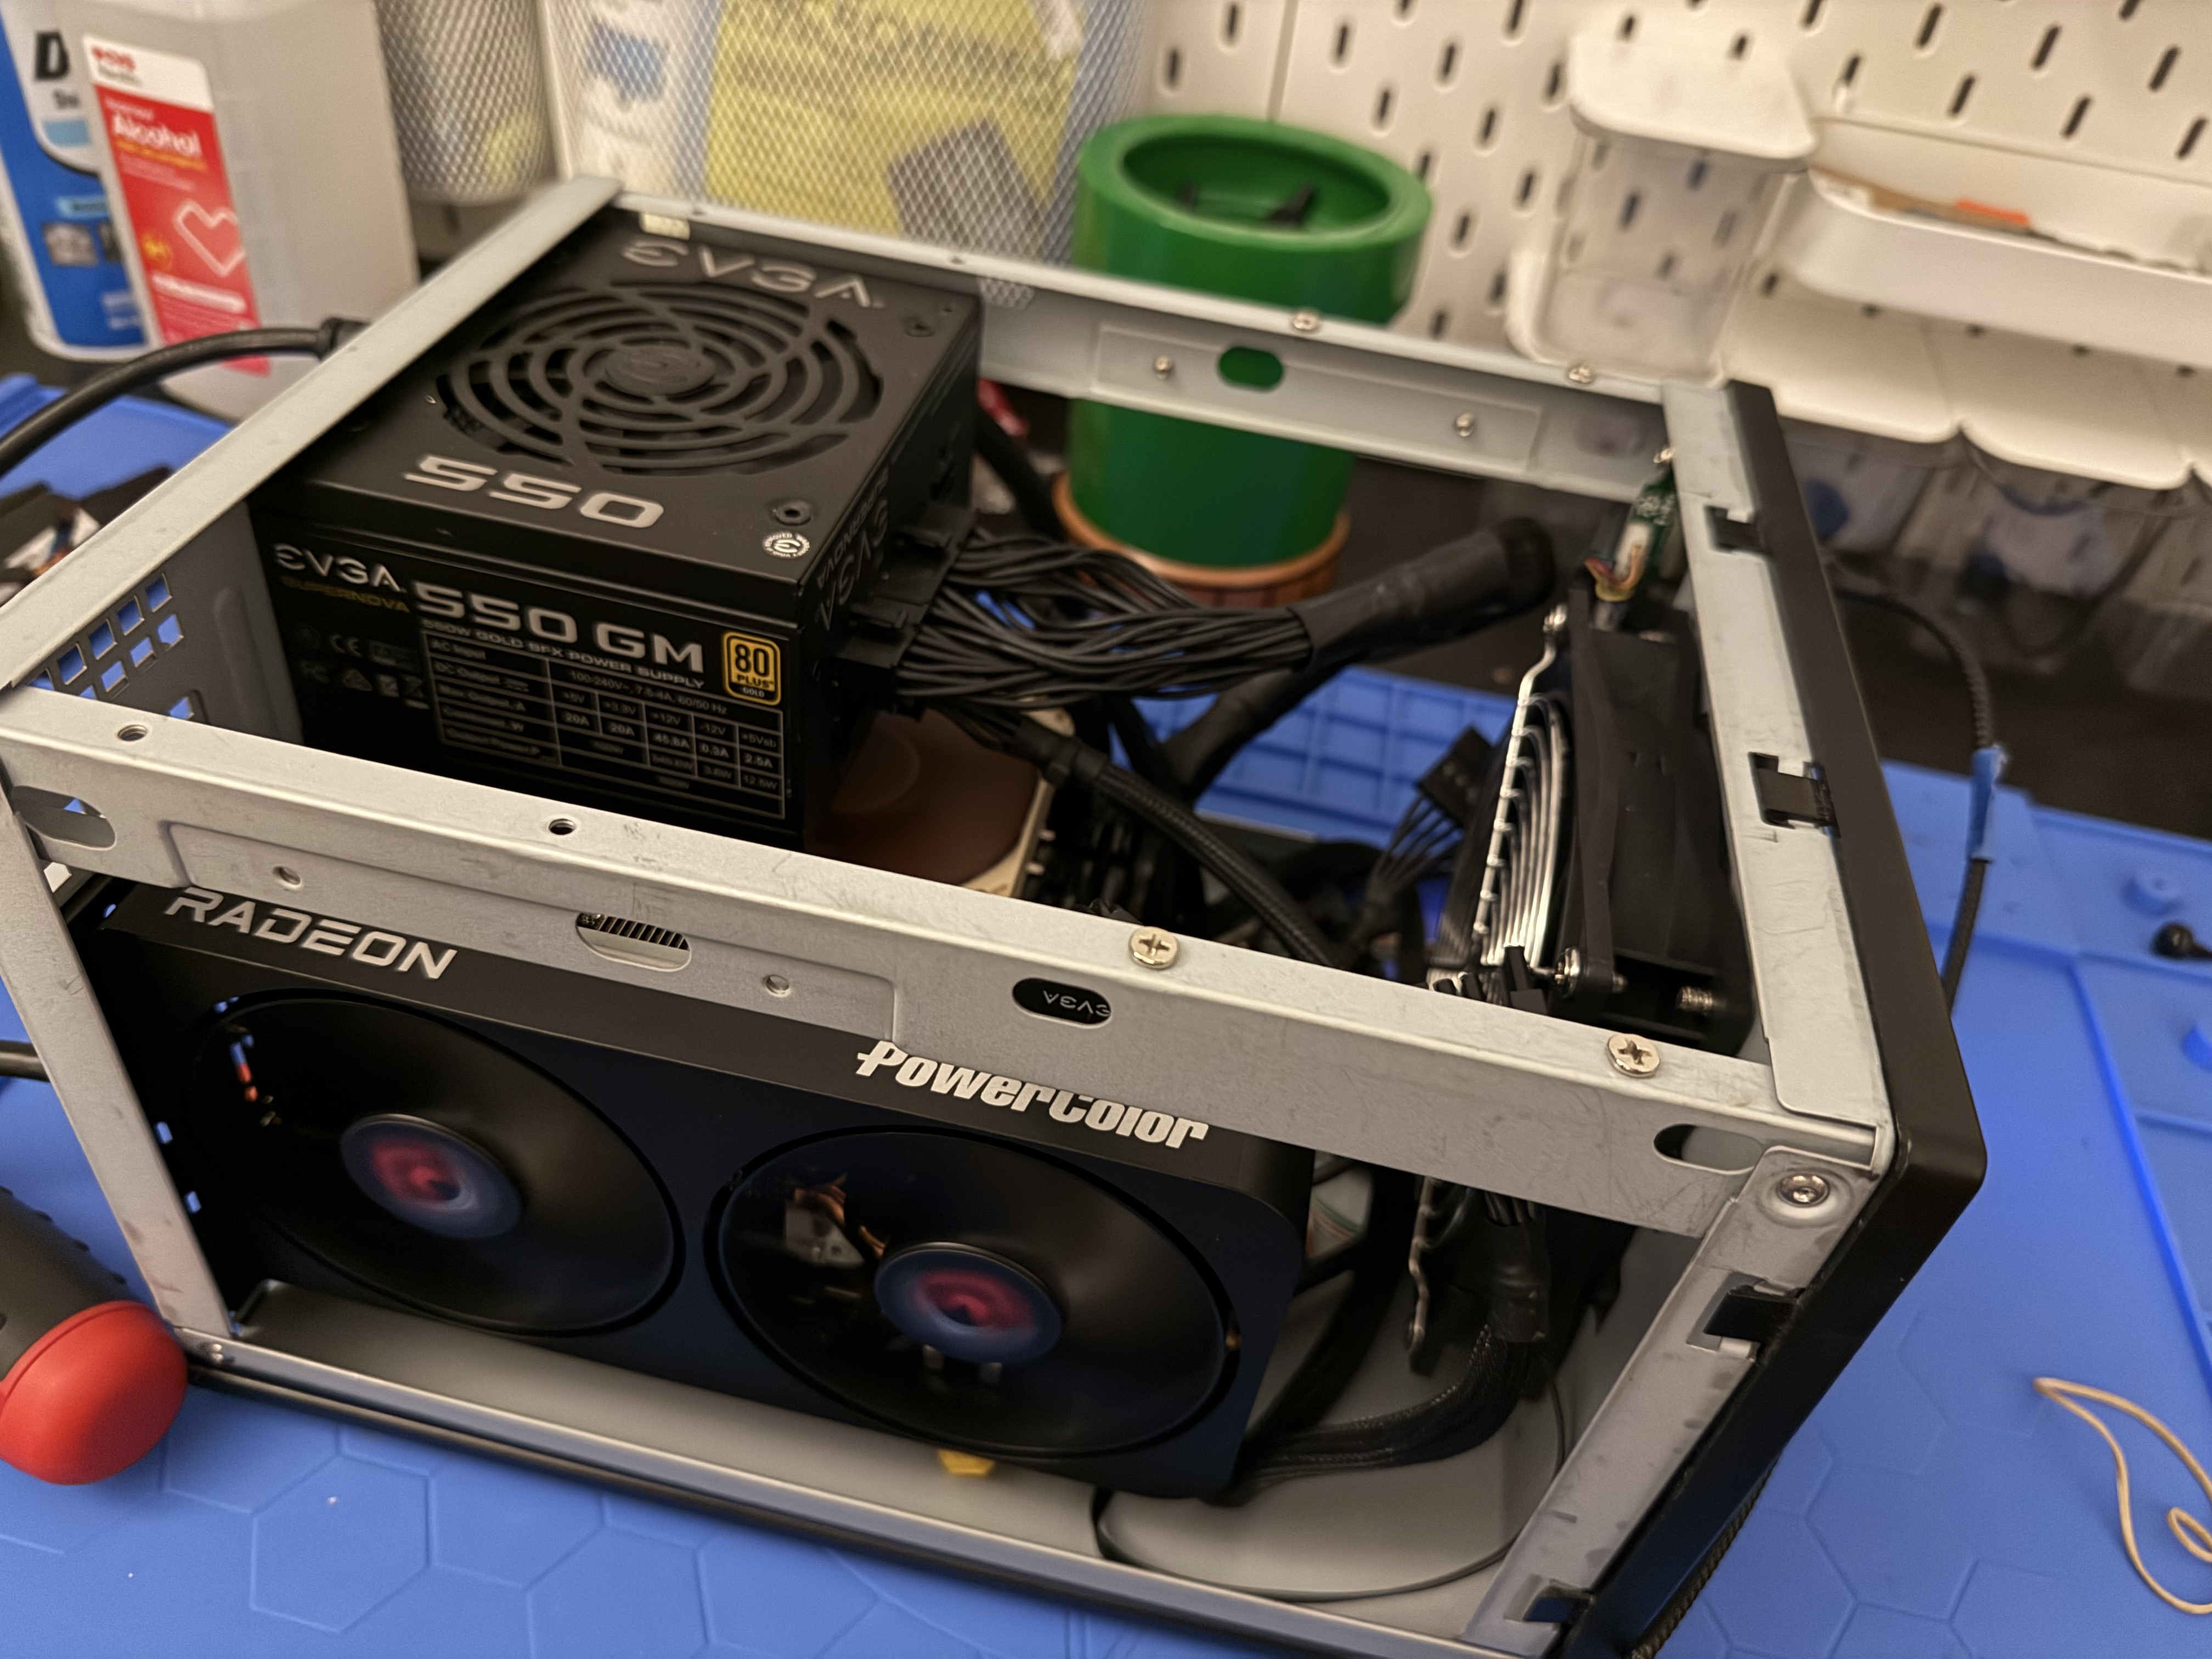
However, we immediately hit problems when trying to boot.
-
No post from the 9060XT. An old Radeon GPU I had lying around posted fine, so I returned the Powercolor card in case it was a lemon. I grabbed an ASRock Challenger 9060XT 16GB instead, which cost me an extra 20 bucks.
-
The ASRock card was far bigger than I thought, and did not fit in the case… so I bought a bigger case. The Cooler Master NR200 was on sale for $60, it can fit even huge 3-slot cards, and includes its own 120mm fan.
-
If I’m getting a bigger case, I might as well get a bigger CPU cooler, and then I don’t even need to run the processor in ECO mode. I grabbed a Thermalright Phantom Spirit 120 for $40, which is essentially the king of budget air coolers.
FINAL(ER) PRICE: $500 + $120 = $620. Still well within budget.
Let’s Try That Again
After a total rebuild in the new case, here’s what the second iteration looks like:
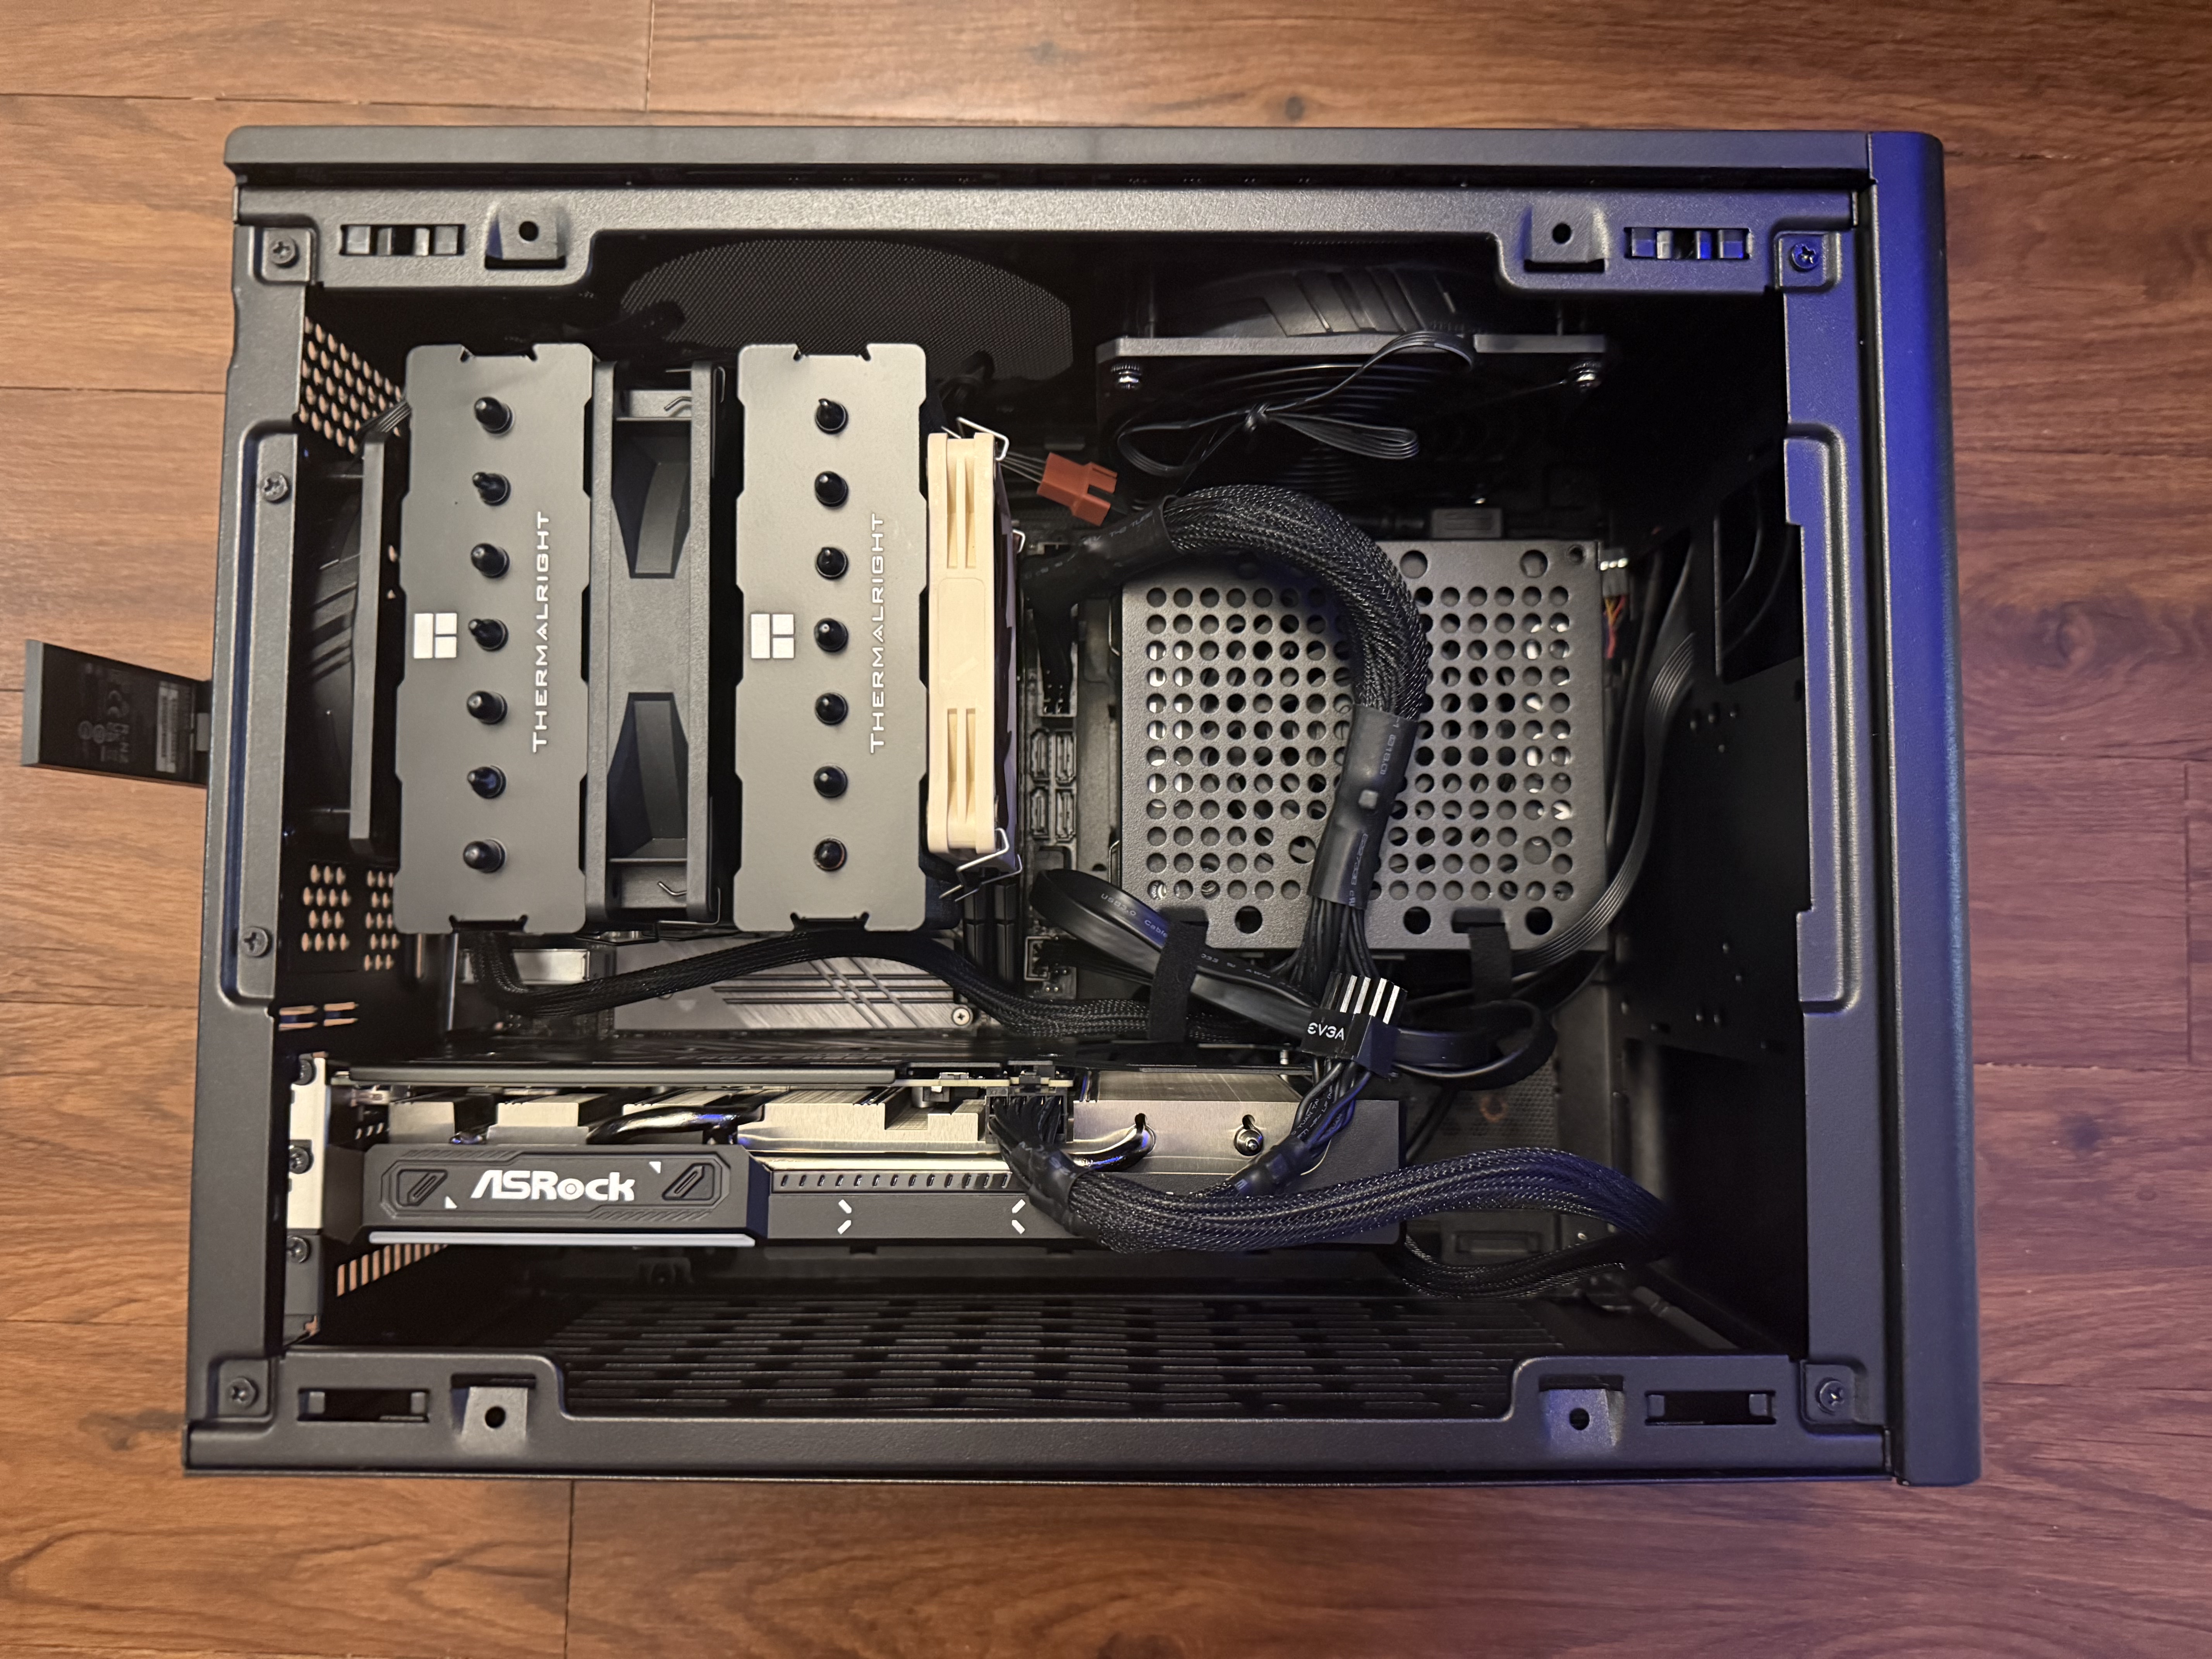
The case wouldn’t fit well next to my TV vertically, so I oriented it horizontally instead. I found a trick on Reddit for screwing the case’s feet into the rear panel’s vent holes, which was quick to do. I used some motherboard gaskets as washers to keep the screws in place.
Alright, let’s try to boot it again! Surely the new GPU will work!
WRONG. No post. Just a black screen. So something else must be going on. The PCIe slot is in-tact because the older GPU I tested with posted fine. And it’s highly unlikely that two cards in a row are dead. Which means it must be some sort of compatibility issue.
It Was a Compatibility Issue
After doing some digging in my UEFI settings, I discovered my motherboard was in CSM mode. CSM stands for “Compatibility Support Module”, and basically emulates the last-gen BIOS firmware at the expense of modern UEFI features. But according to AMD, the new 9000 series GPUs only support UEFI. That’s our issue right there.
I dug out another older GPU that would allow me to reach the firmware menu, swapped over to UEFI mode, and reinstalled the 9060XT. And finally…
It boots!
I can cautiously say we’re almost to the part where we play video games.
Installing Bazzite
There are several prebuilt Bazzite images to match different hardware and use cases. As mentioned before, we’re going with bazzite-deck, which provides a console-like experience on AMD hardware.
The install process is essentially the same as any other GUI-centric Linux distro. Burn the ISO image to a USB drive, boot the target machine from it, and follow the steps in the graphical installer. The only extra step for Bazzite is to log into Steam.
When you’re done, you’ll be greeted with an almost-perfect clone of the SteamOS UI:
Playing Games
Damn, was this all worth it. 4k 120hz with HDR and FreeSync. A beautiful sight to behold.
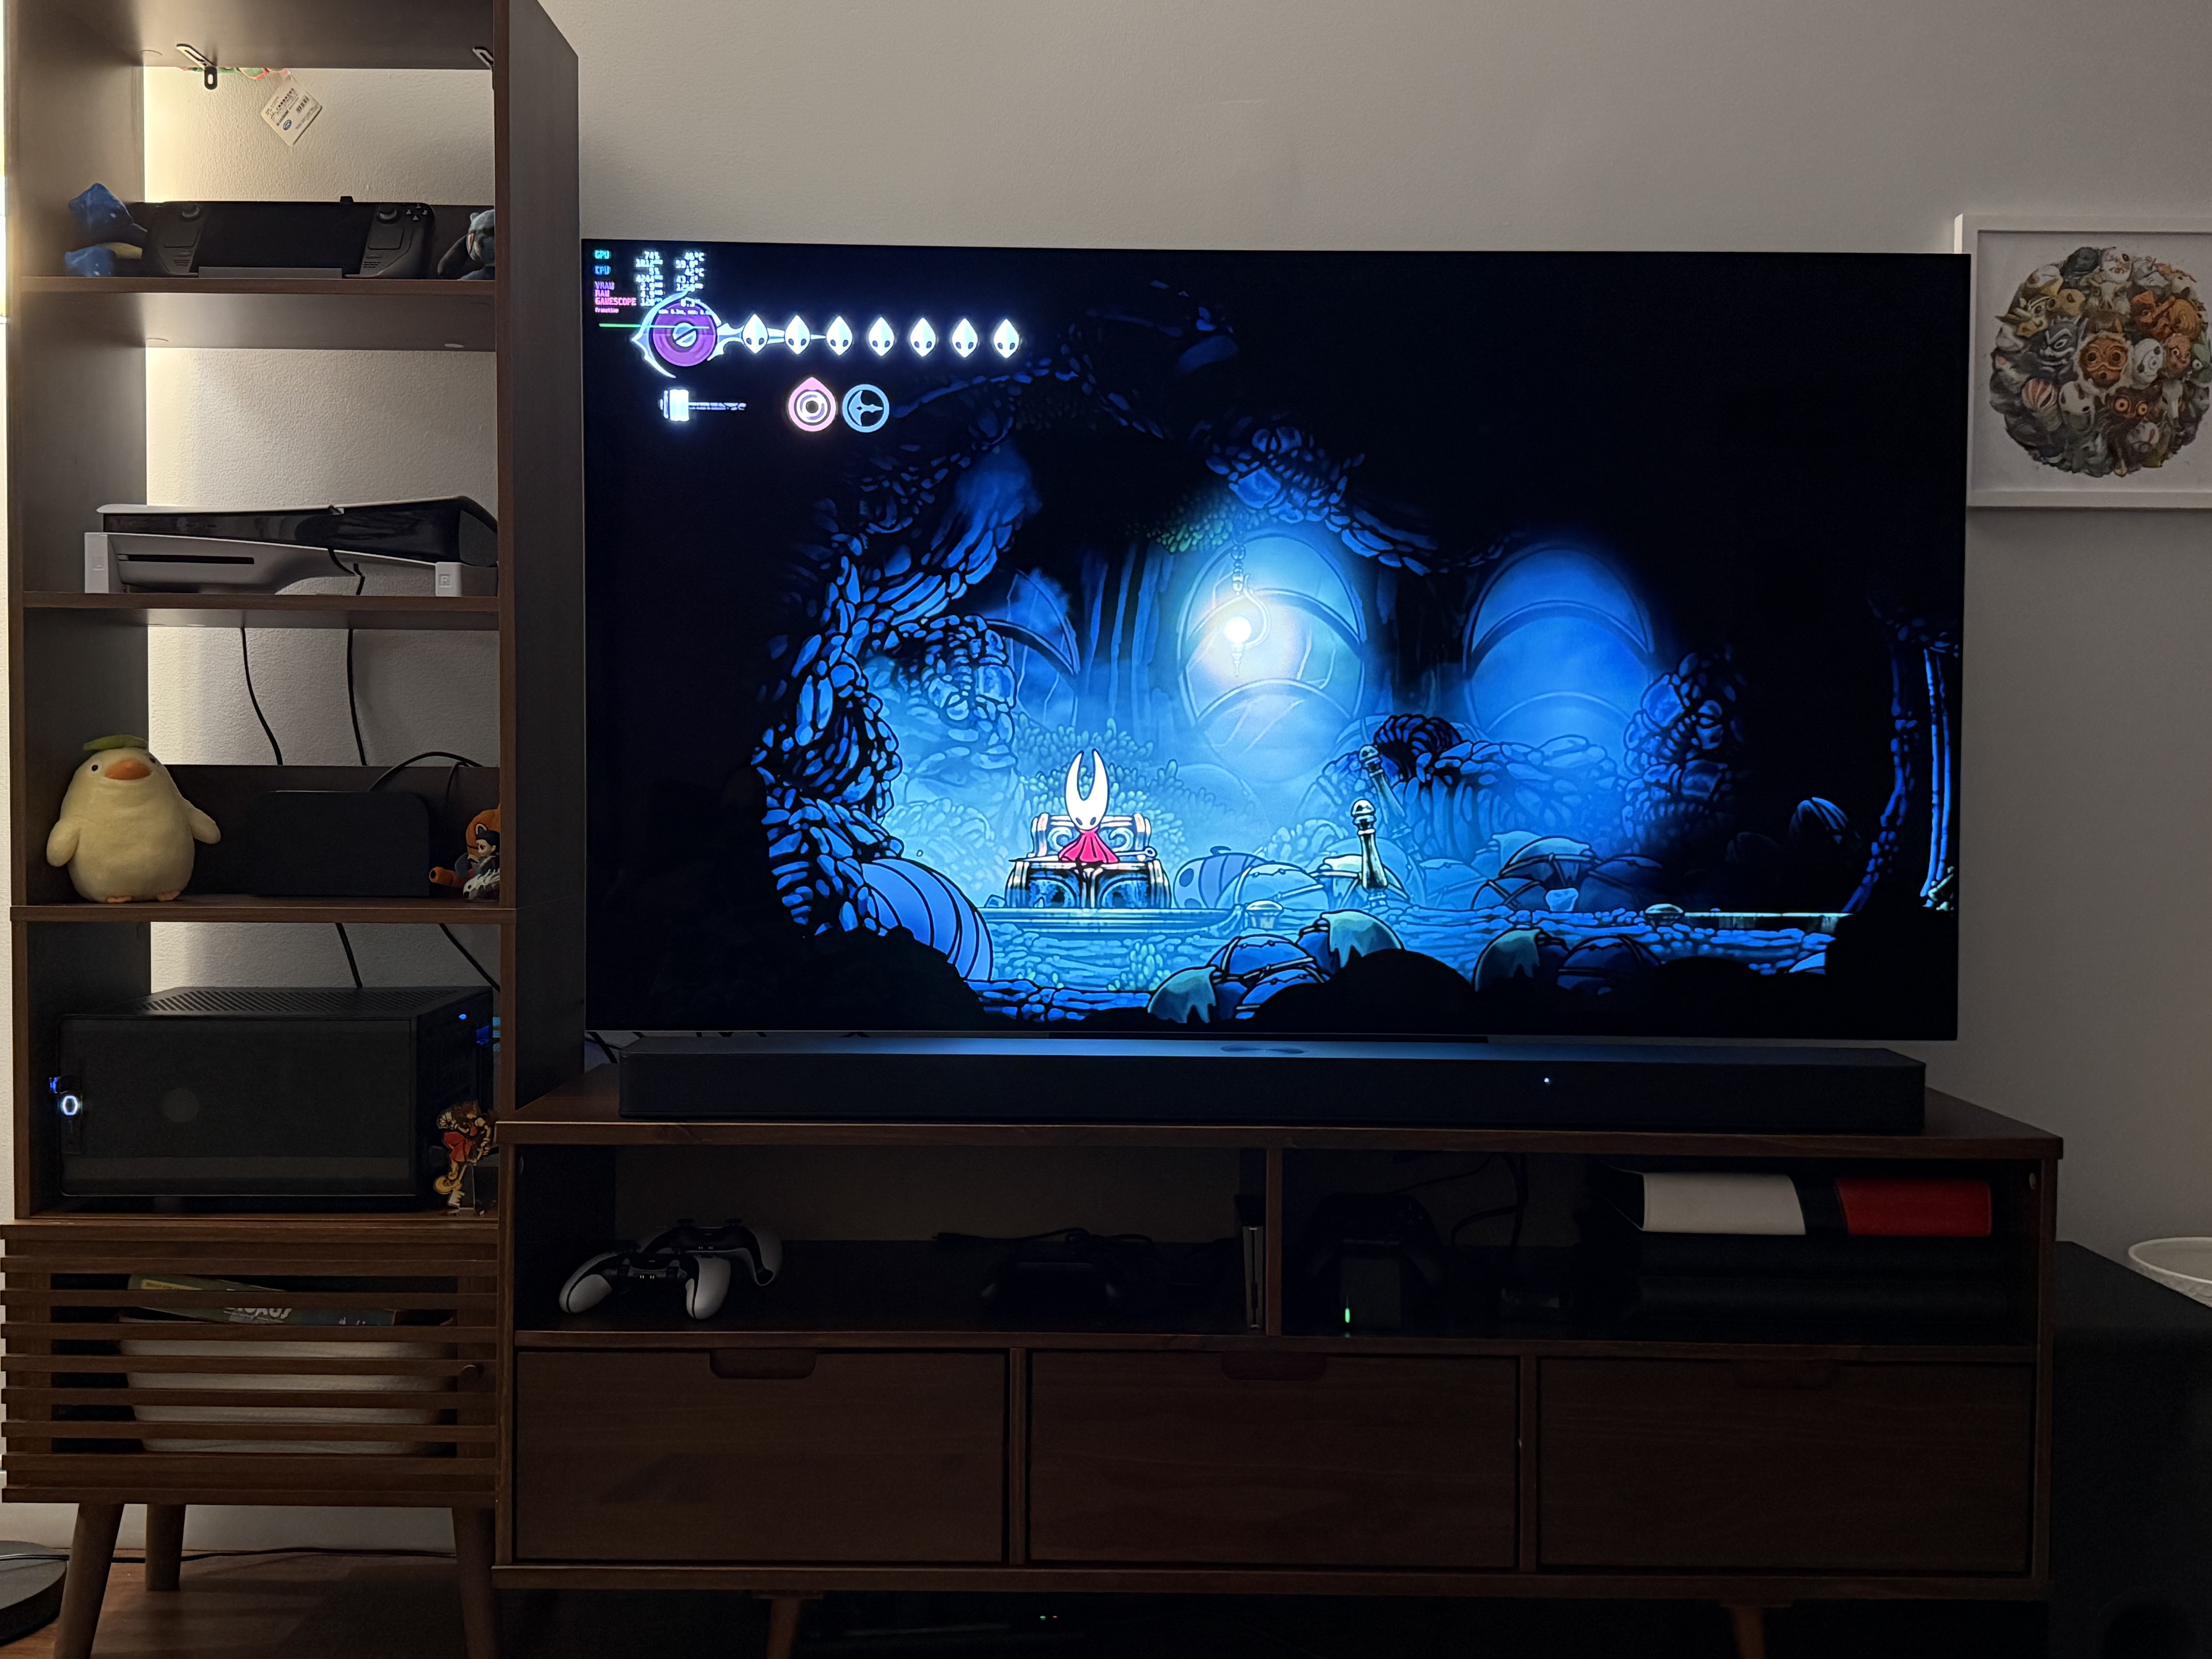
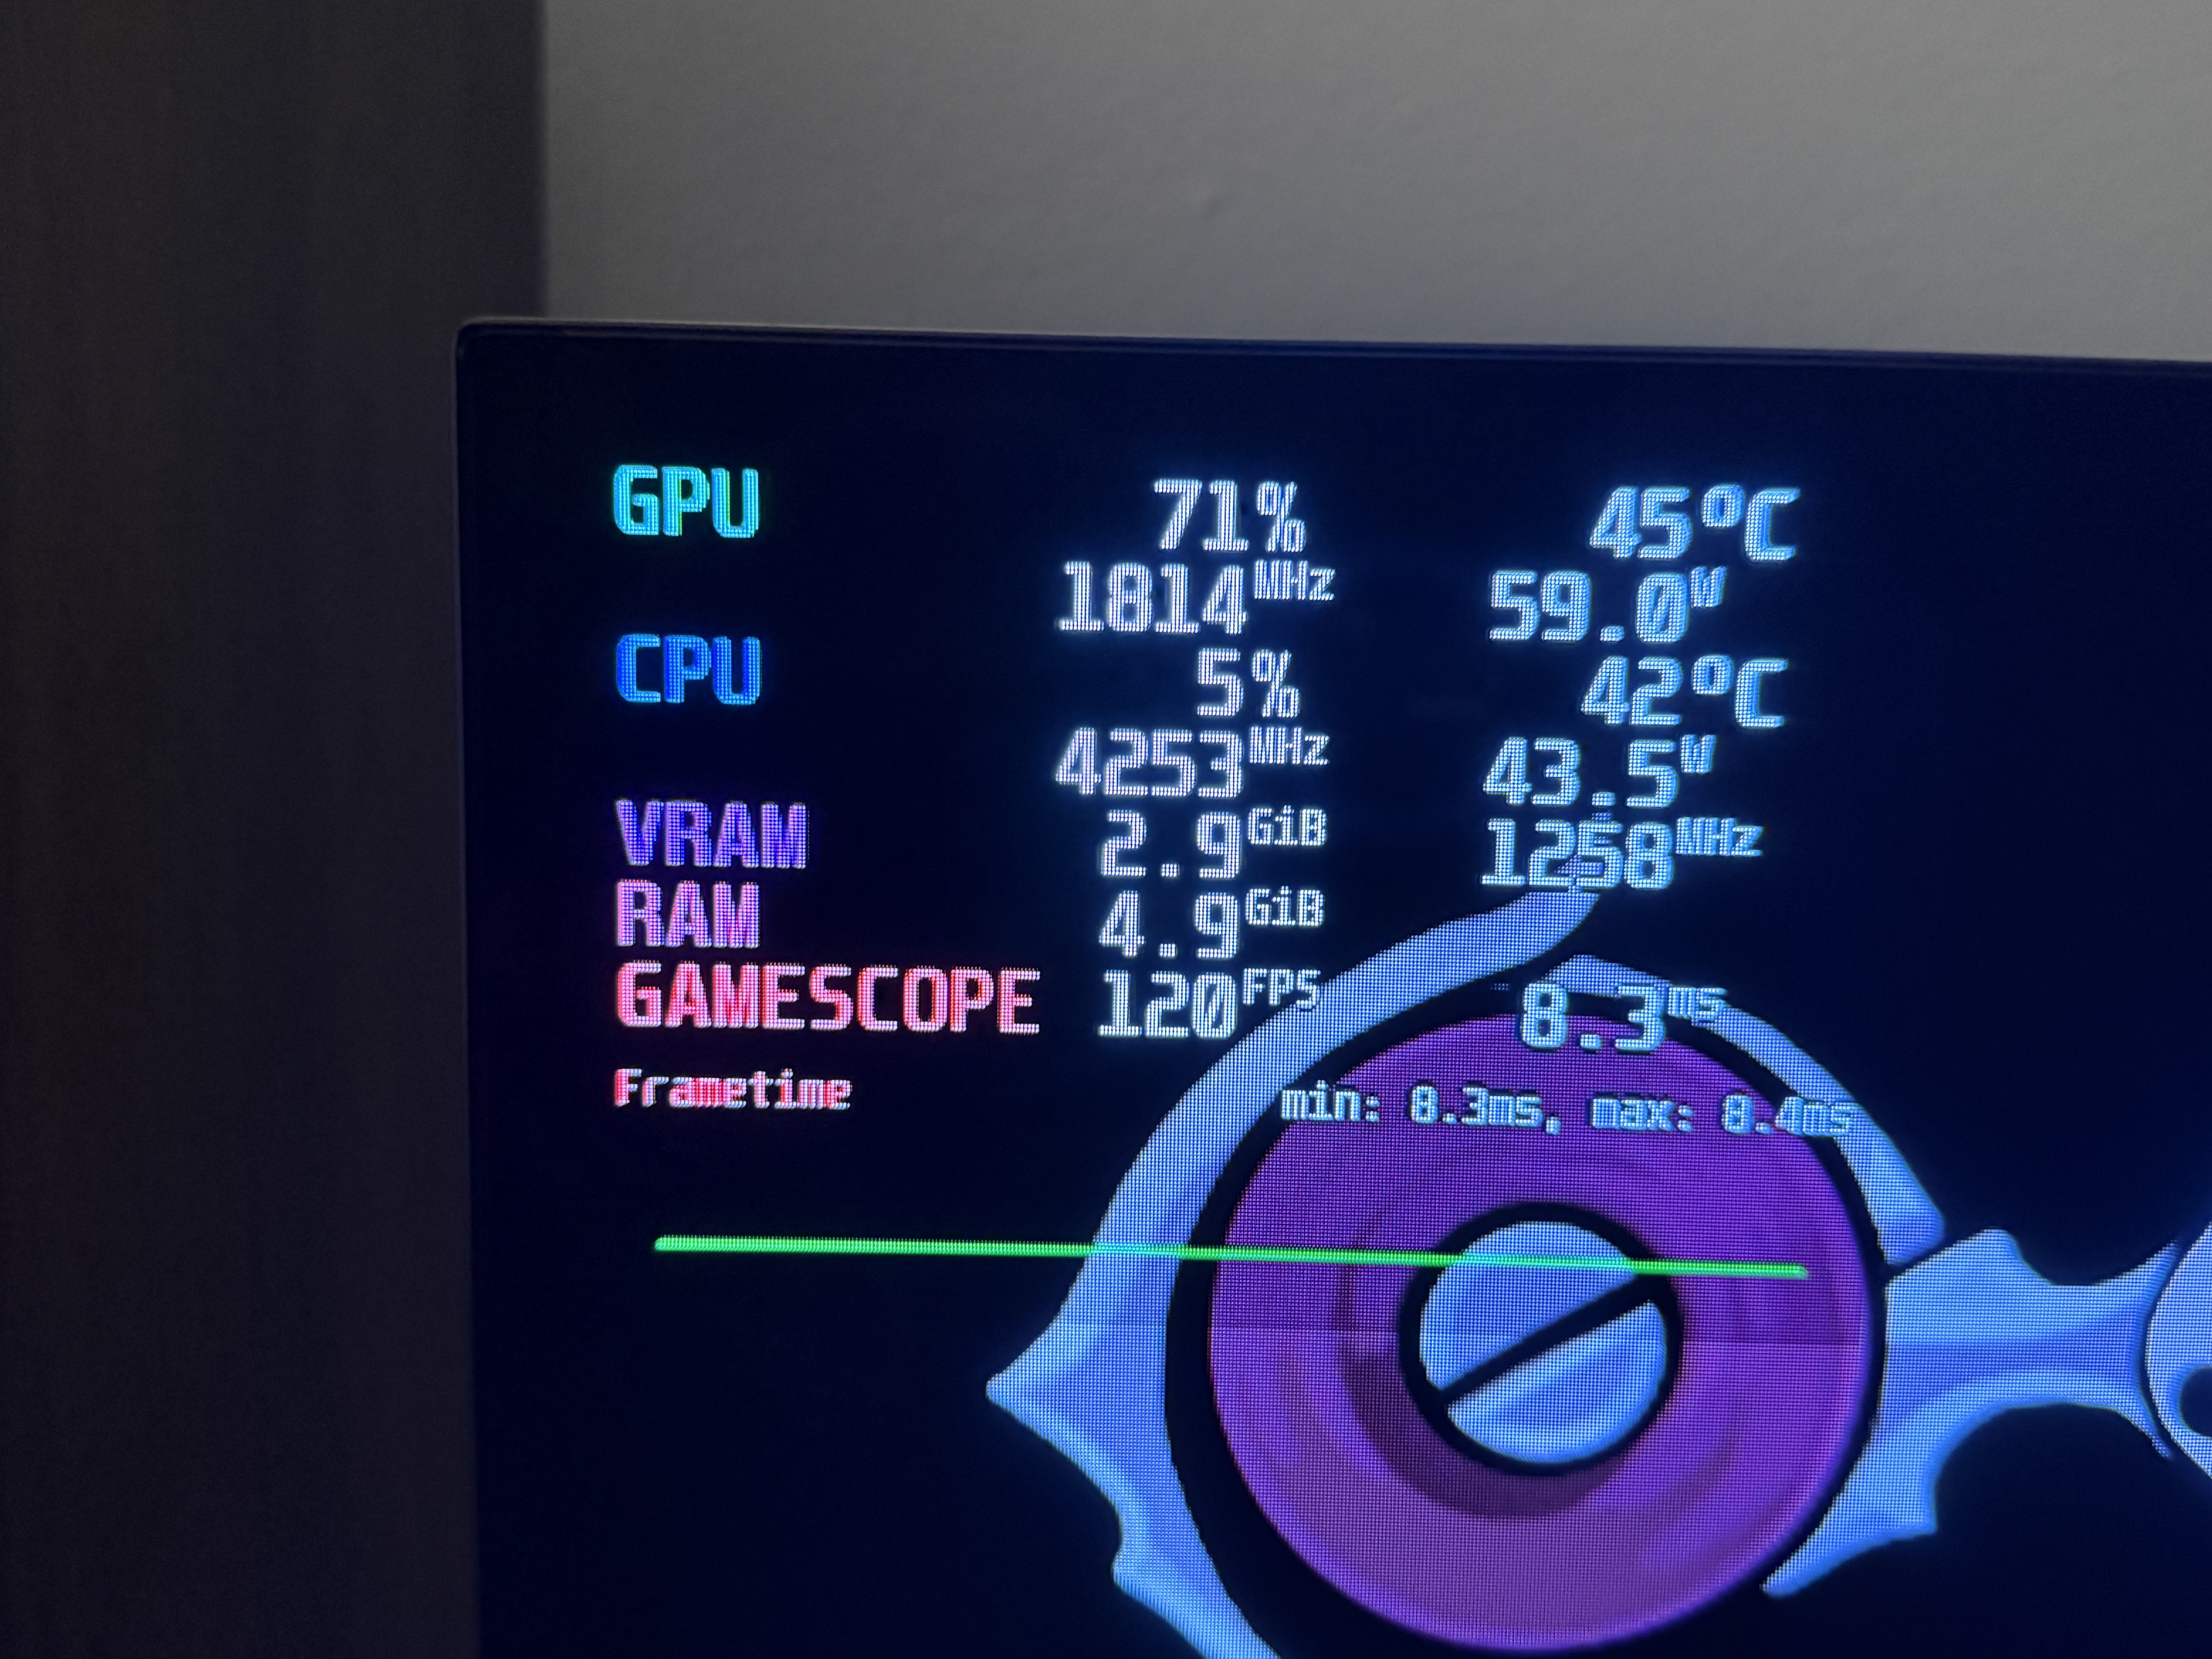
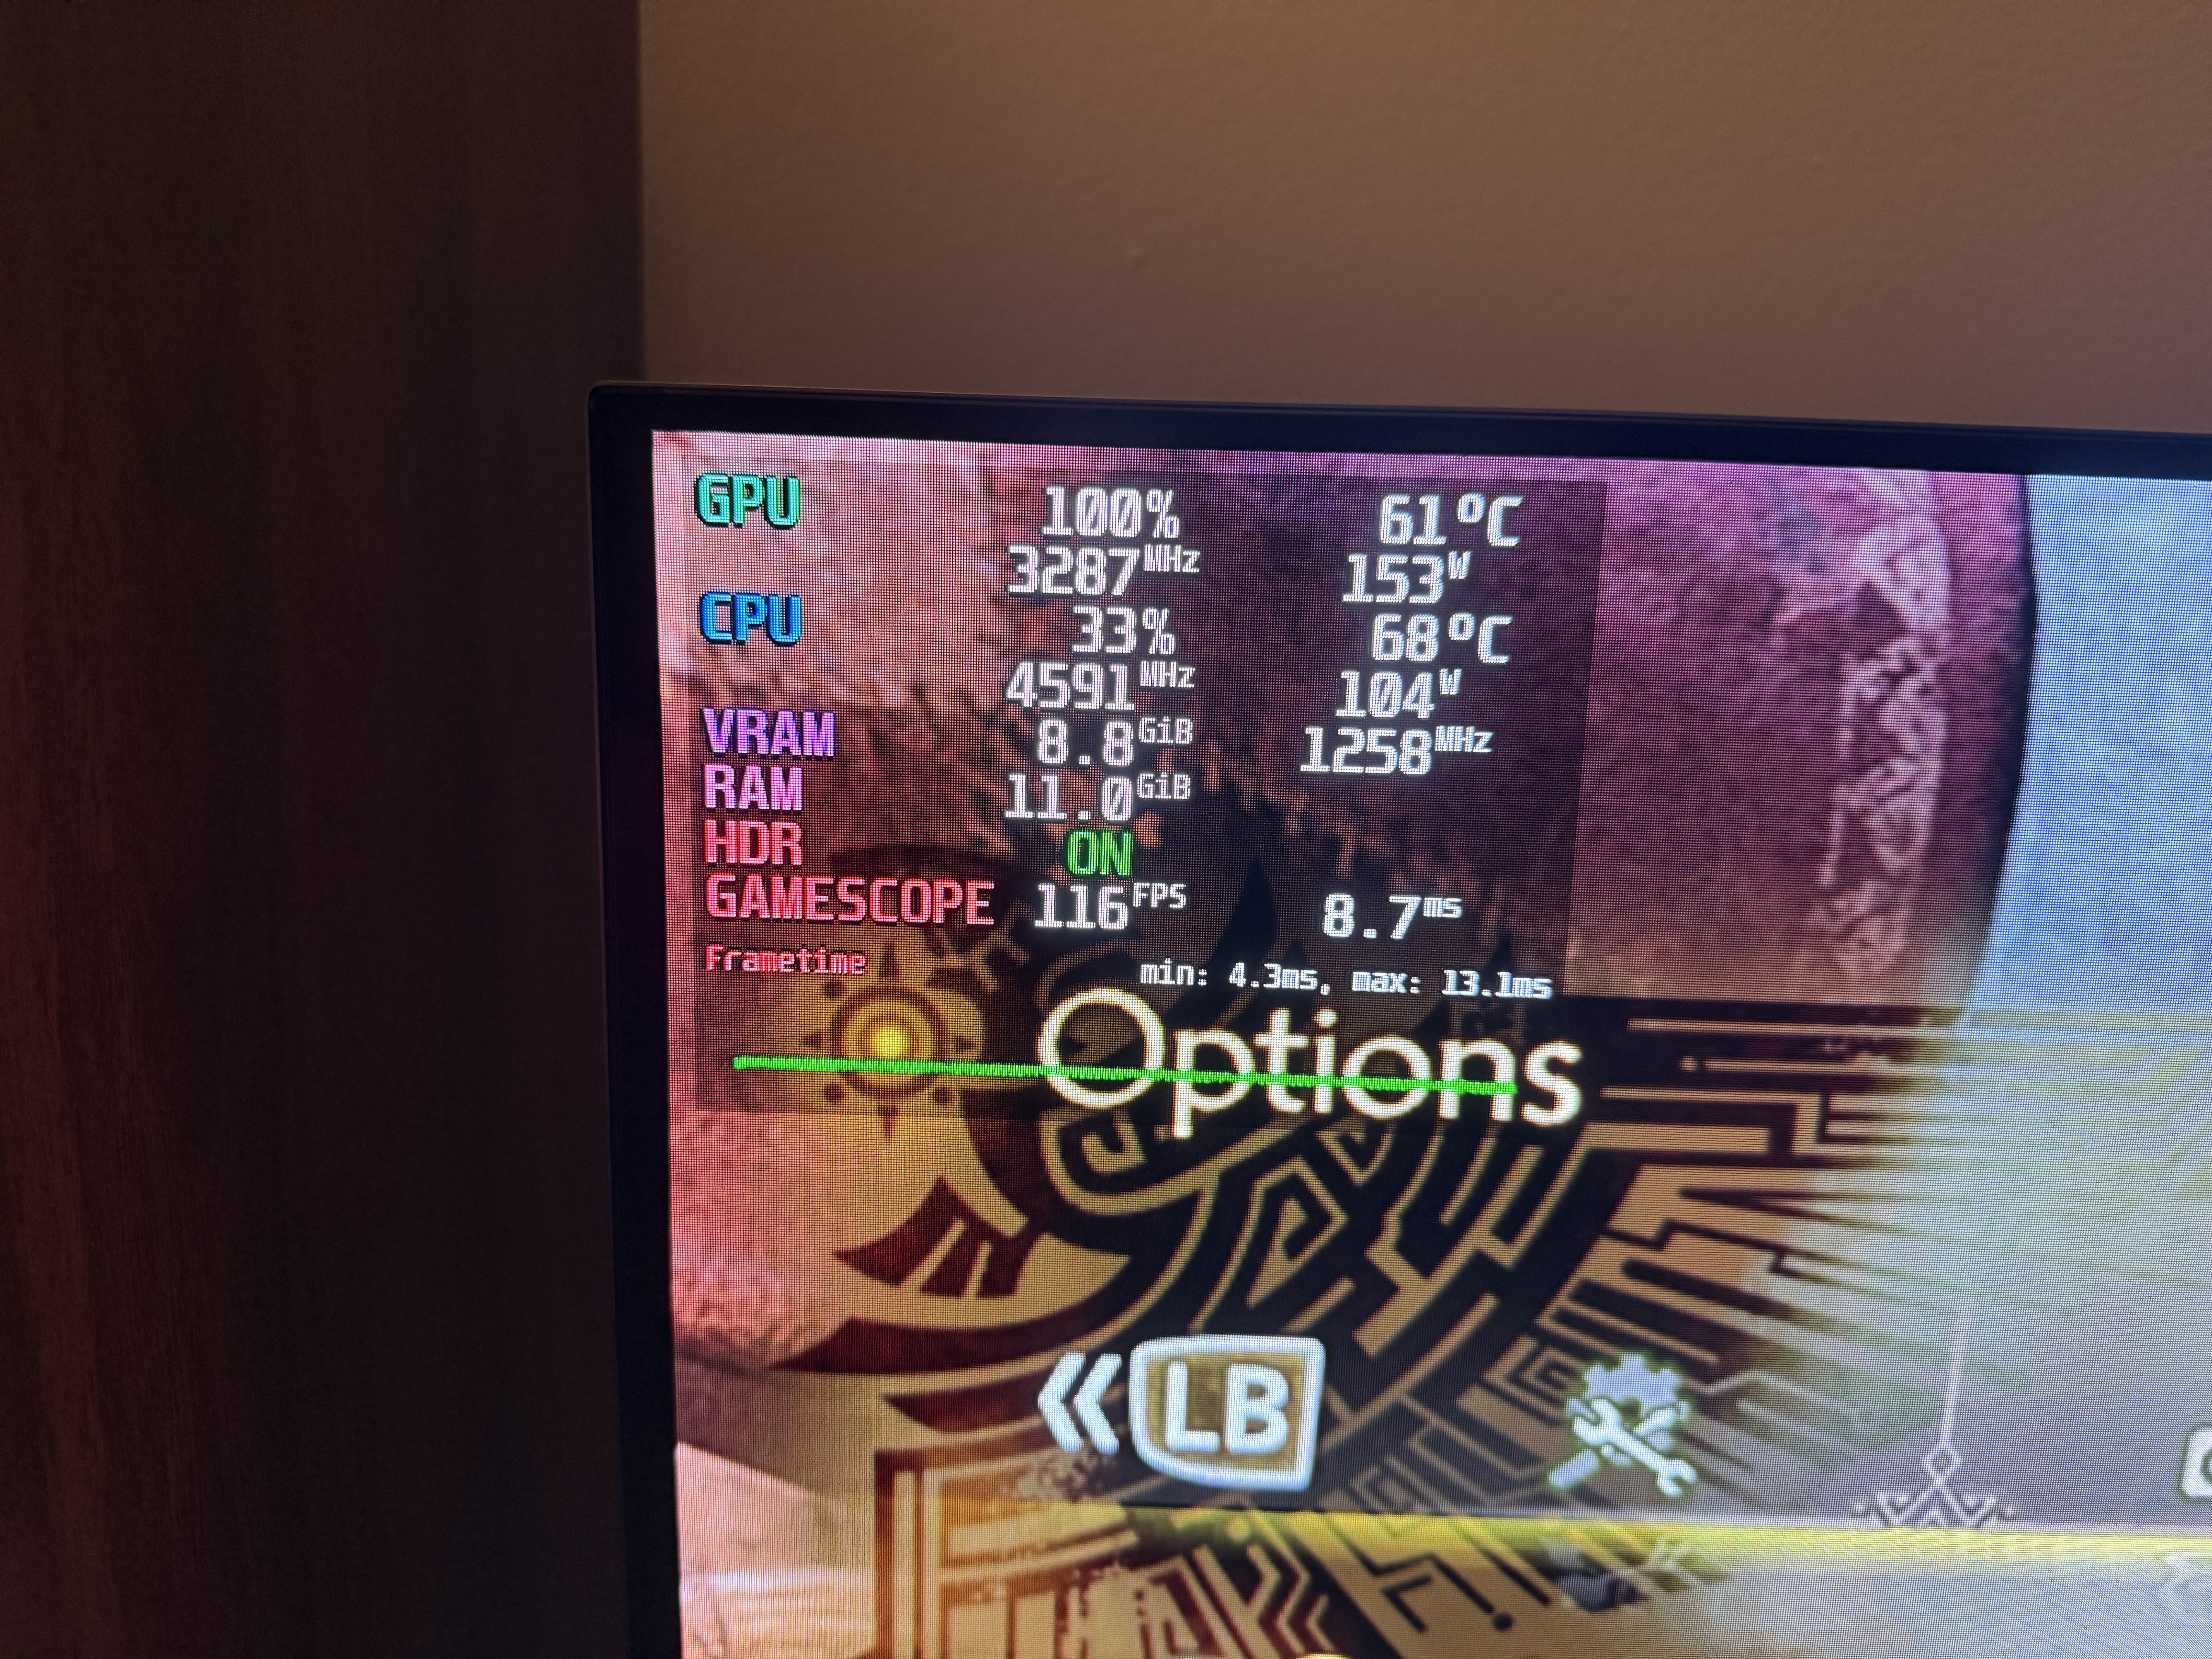
The first game I tested was Hollow Knight: Silksong, which I have been obsessed with for a month or so. It’s a 2D Metroidvania-style game, so not particularly graphically intensive. I was able to run it at native 4k resolution, at a rock-solid 120fps, with no issues! Not surprising, but it still made me happy.
So I decided my next test would be Monster Hunter Wilds, at the opposite end of the performance spectrum. This game ran so poorly when it launched in February that it tanked the Steam reviews. It’s still not optimized well today, but I had some surprising results. First I tried running this game at our target 1080p resolution at ultra settings, used FSR 3 upscaling, and enabled AI frame generation.
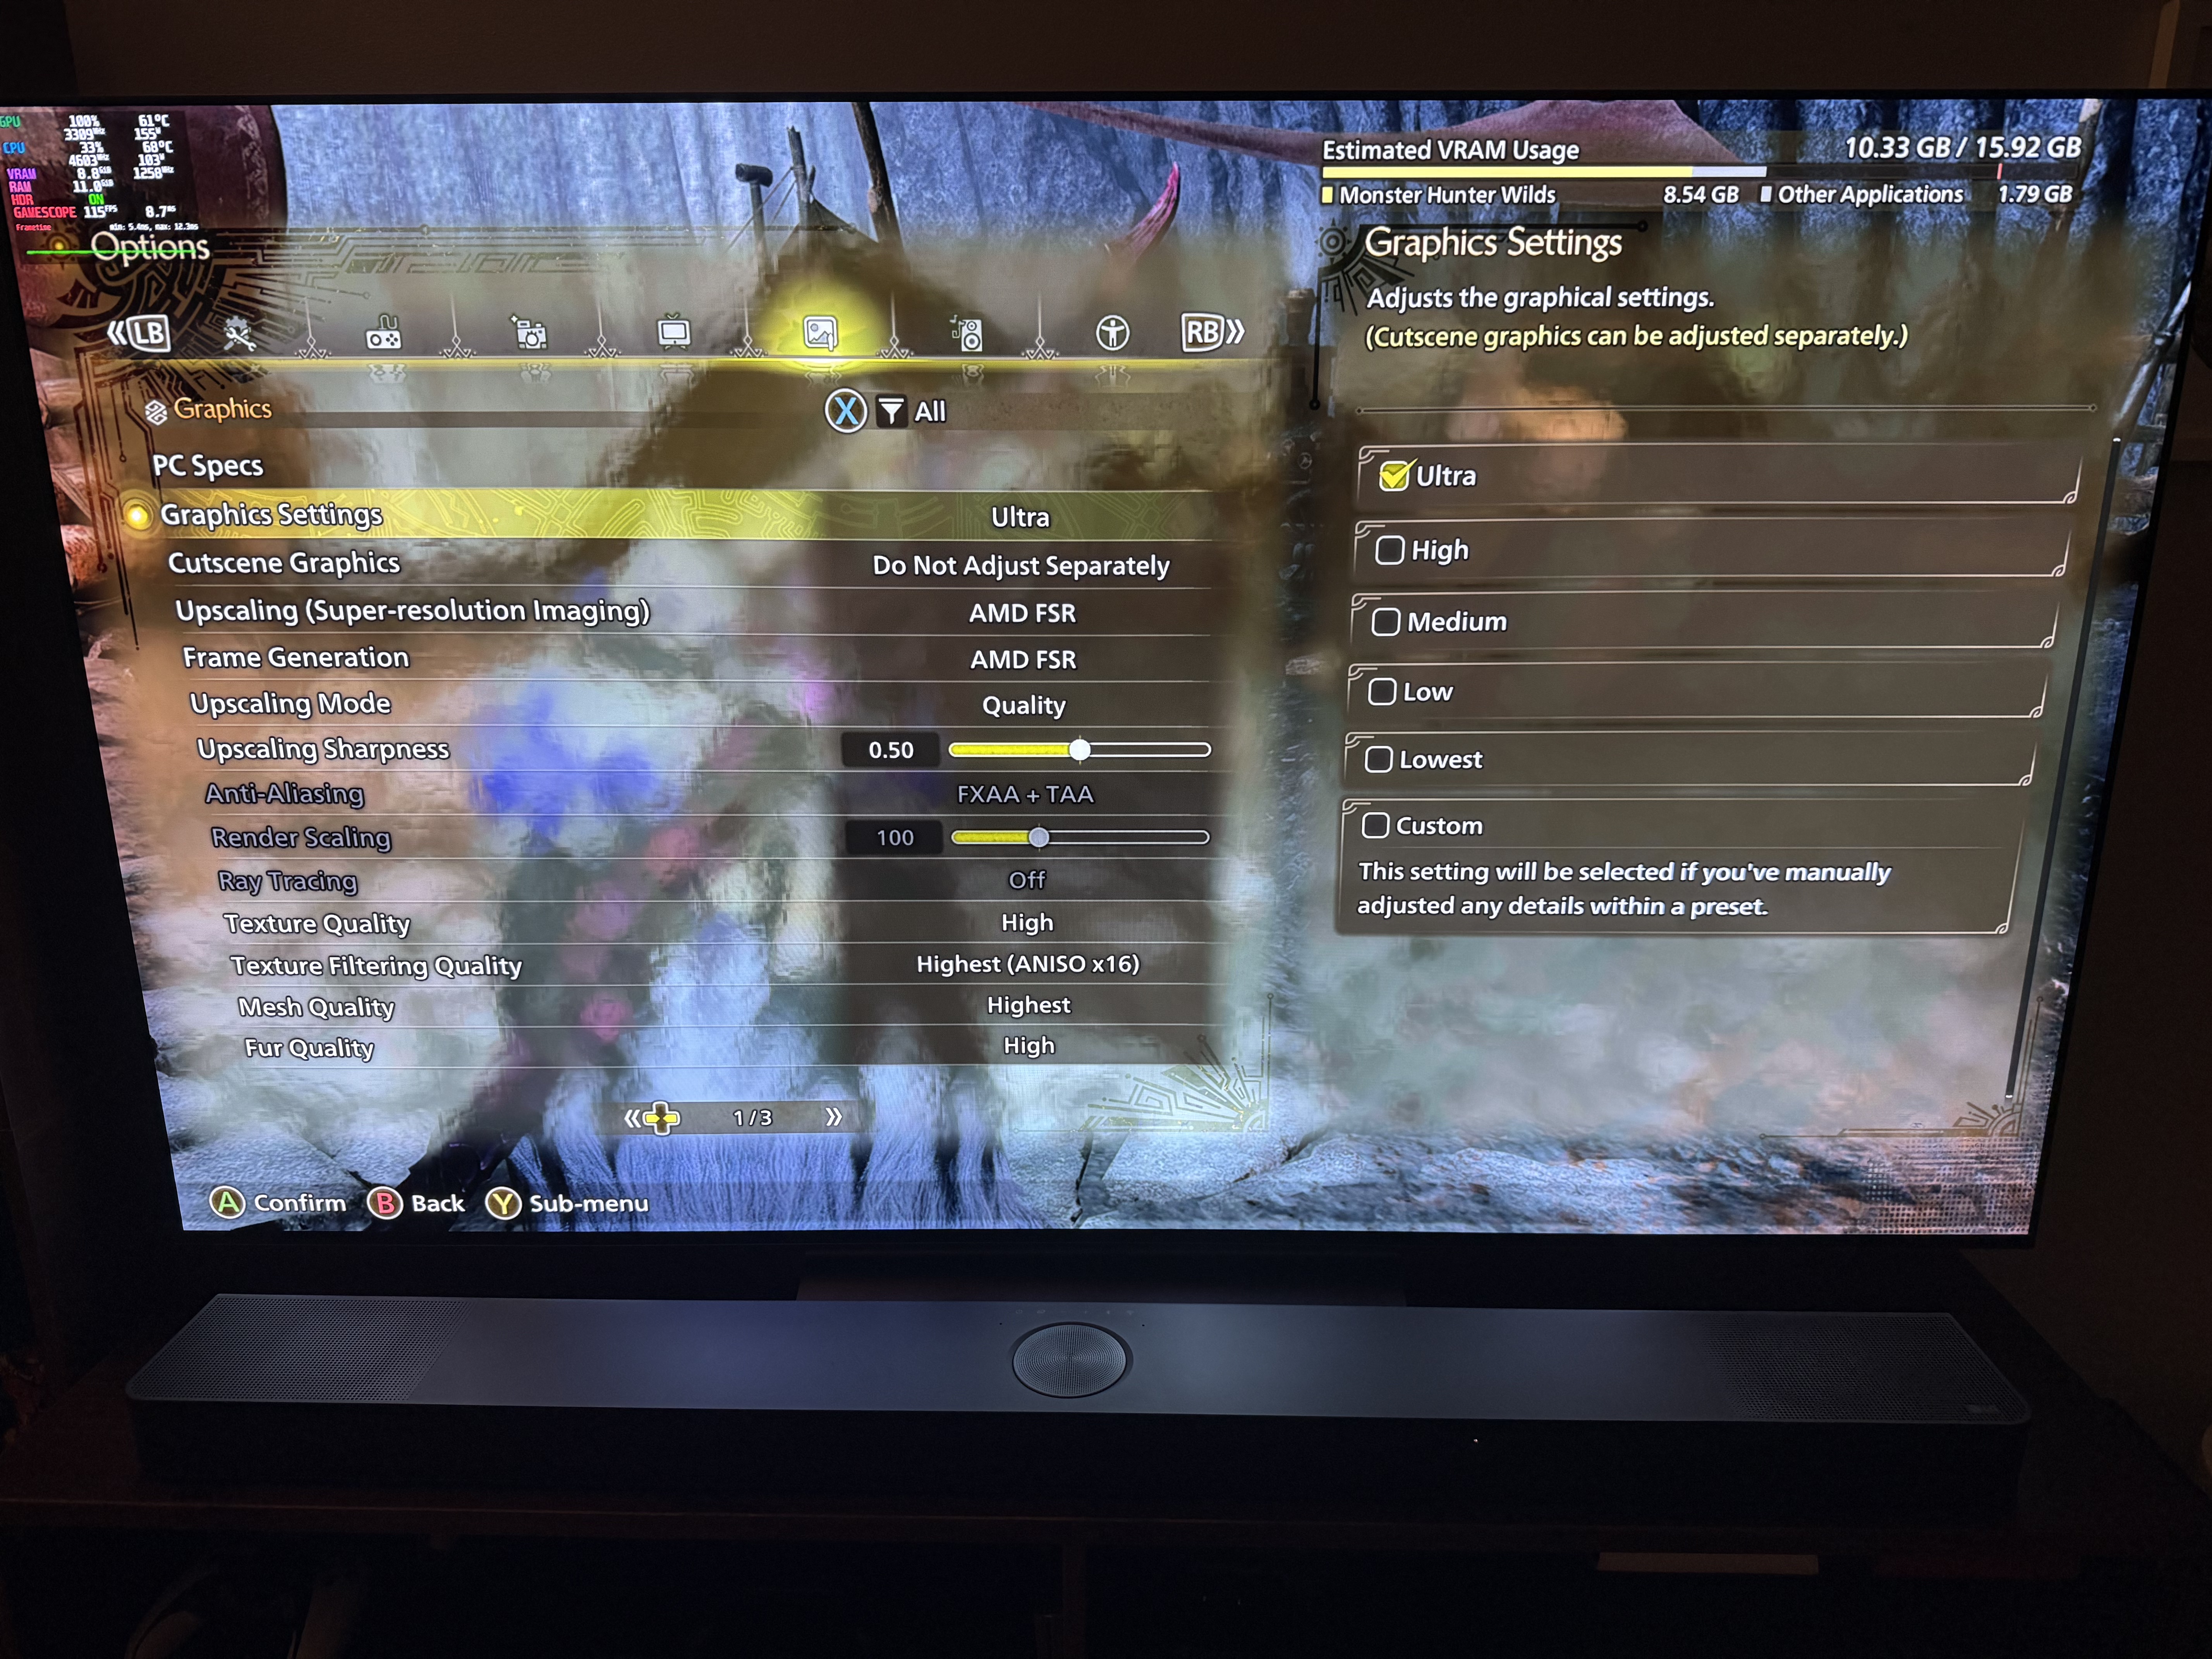
I was able to hit 120fps, but not consistently. I saw dips into the double-digits, but it generally stayed above 100 at least.
Then I ran the same settings with frame generation turned off. My fps fluctuated between the 70s and 90s, but I don’t think I saw it dip below 60 once!
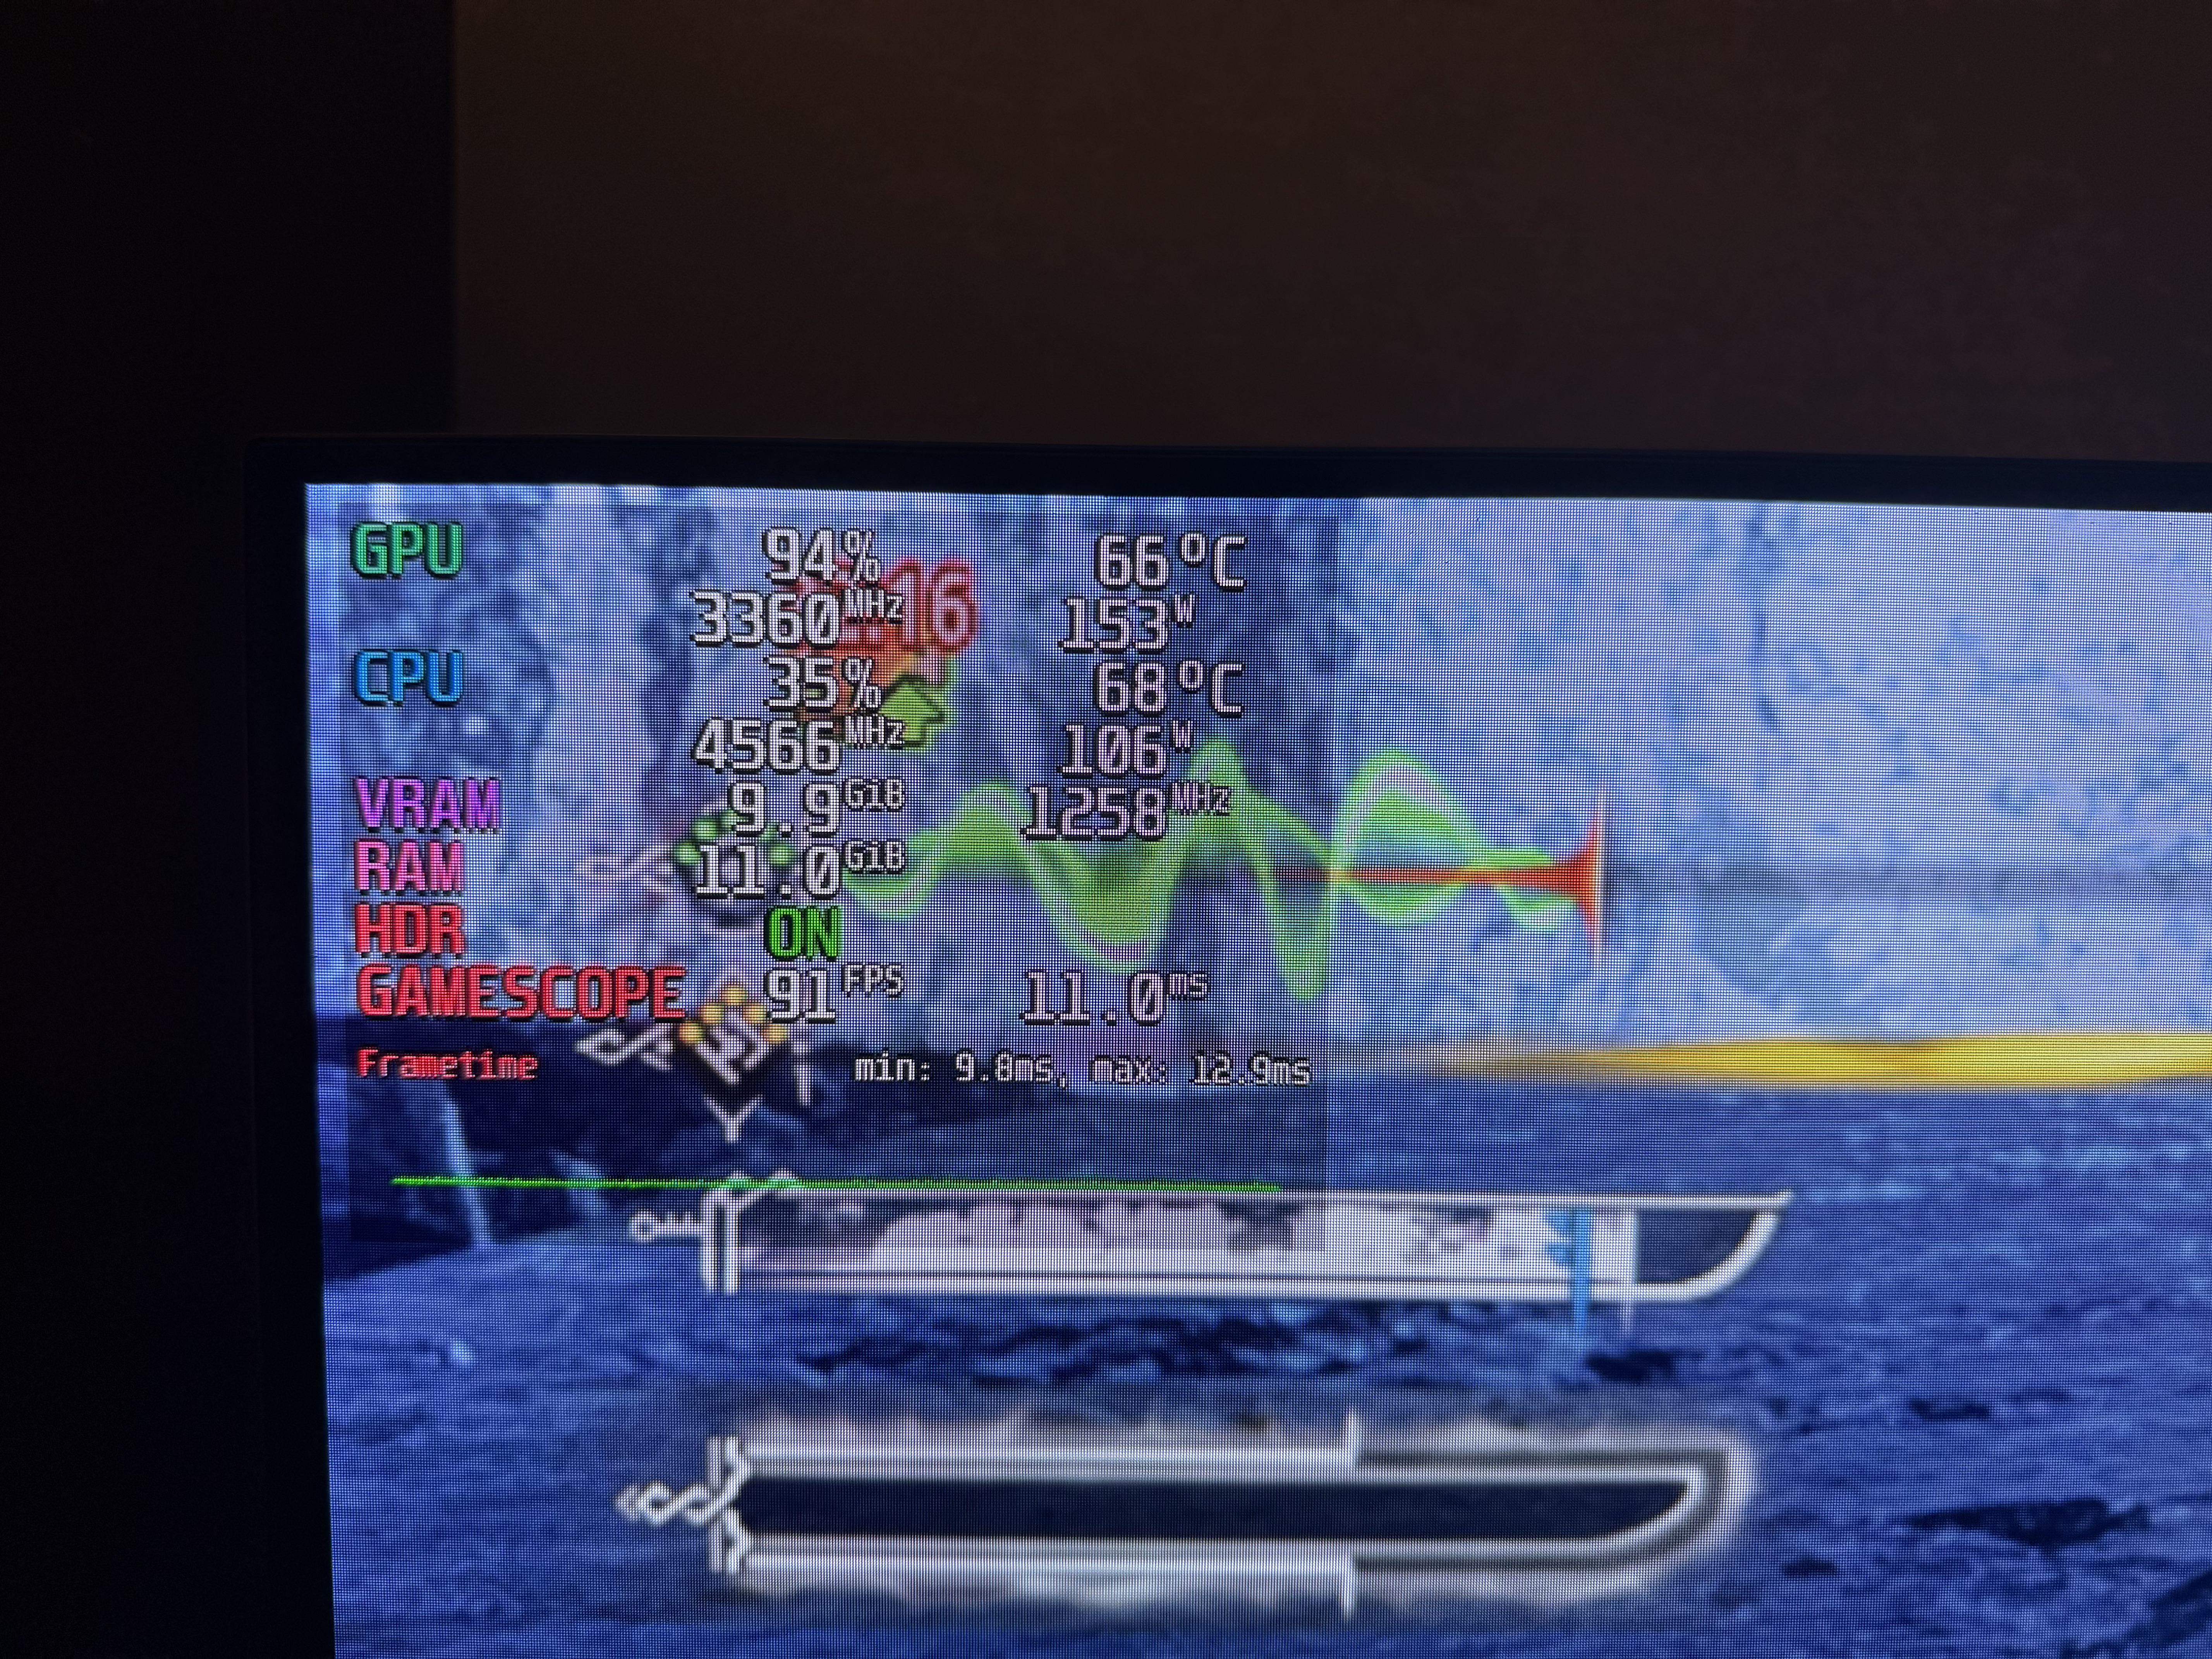
That means this machine can squeeze a good experience out of even worst-case-scenario games, which is a fantastic result!
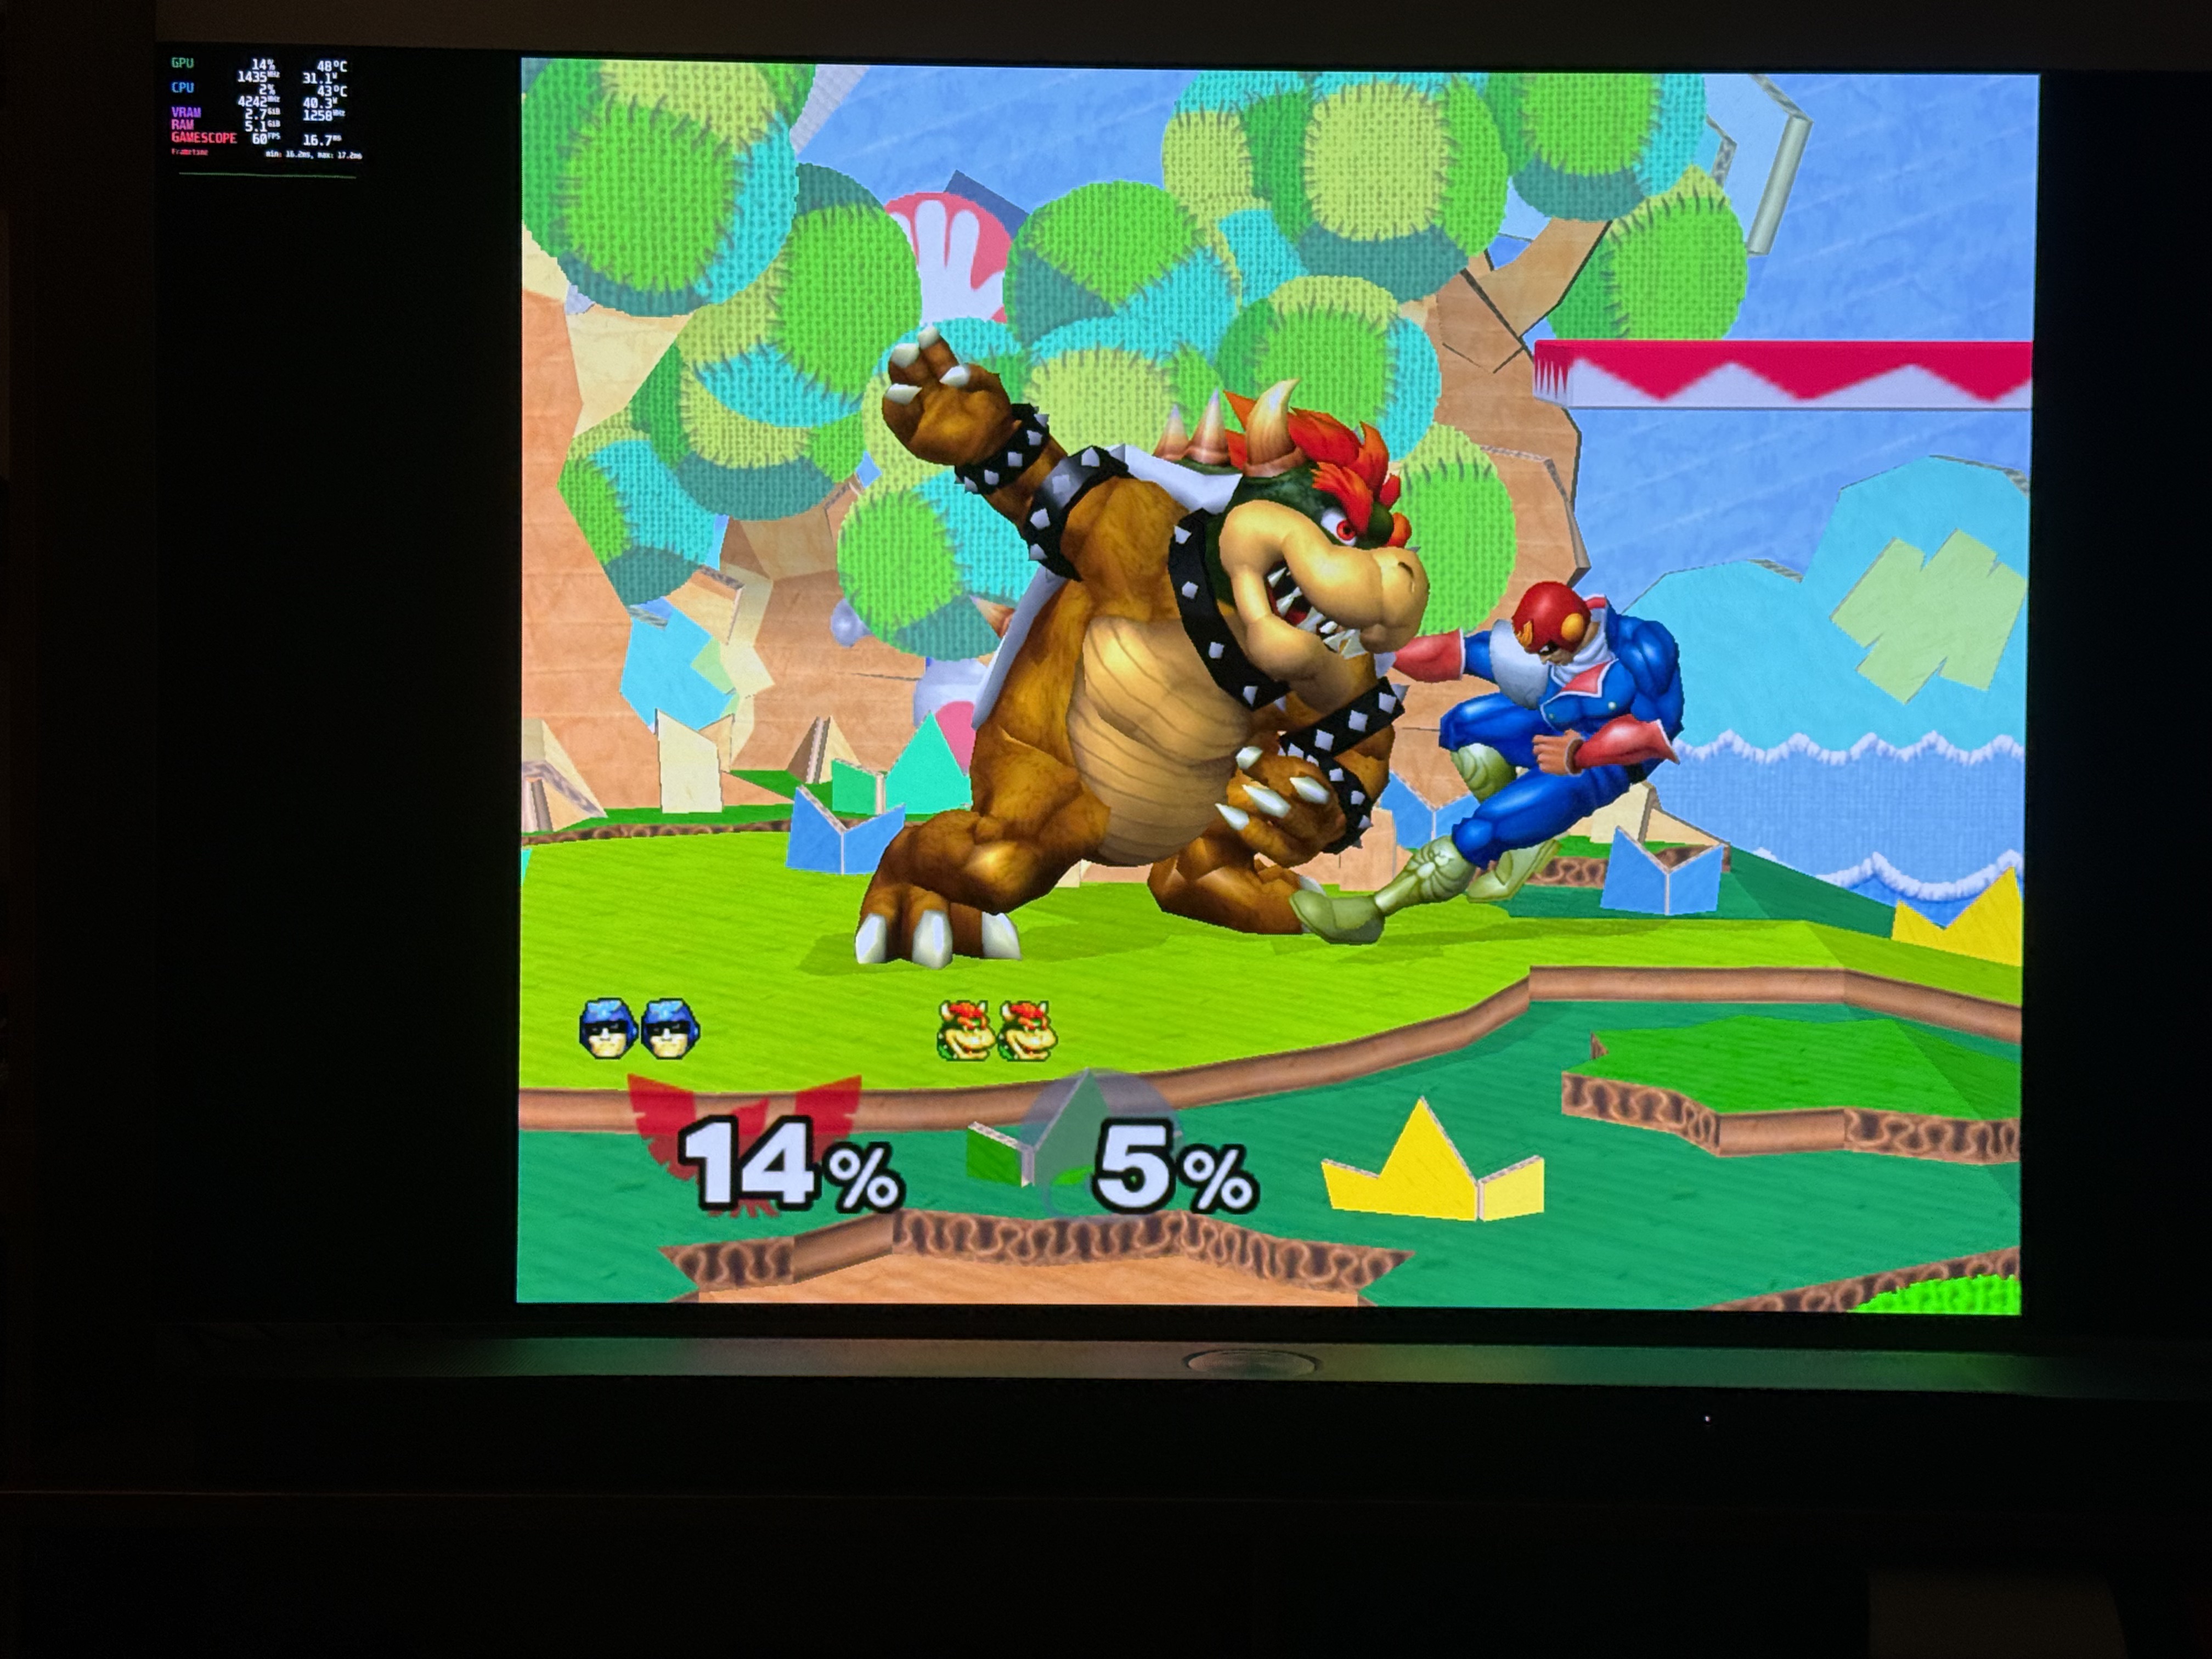
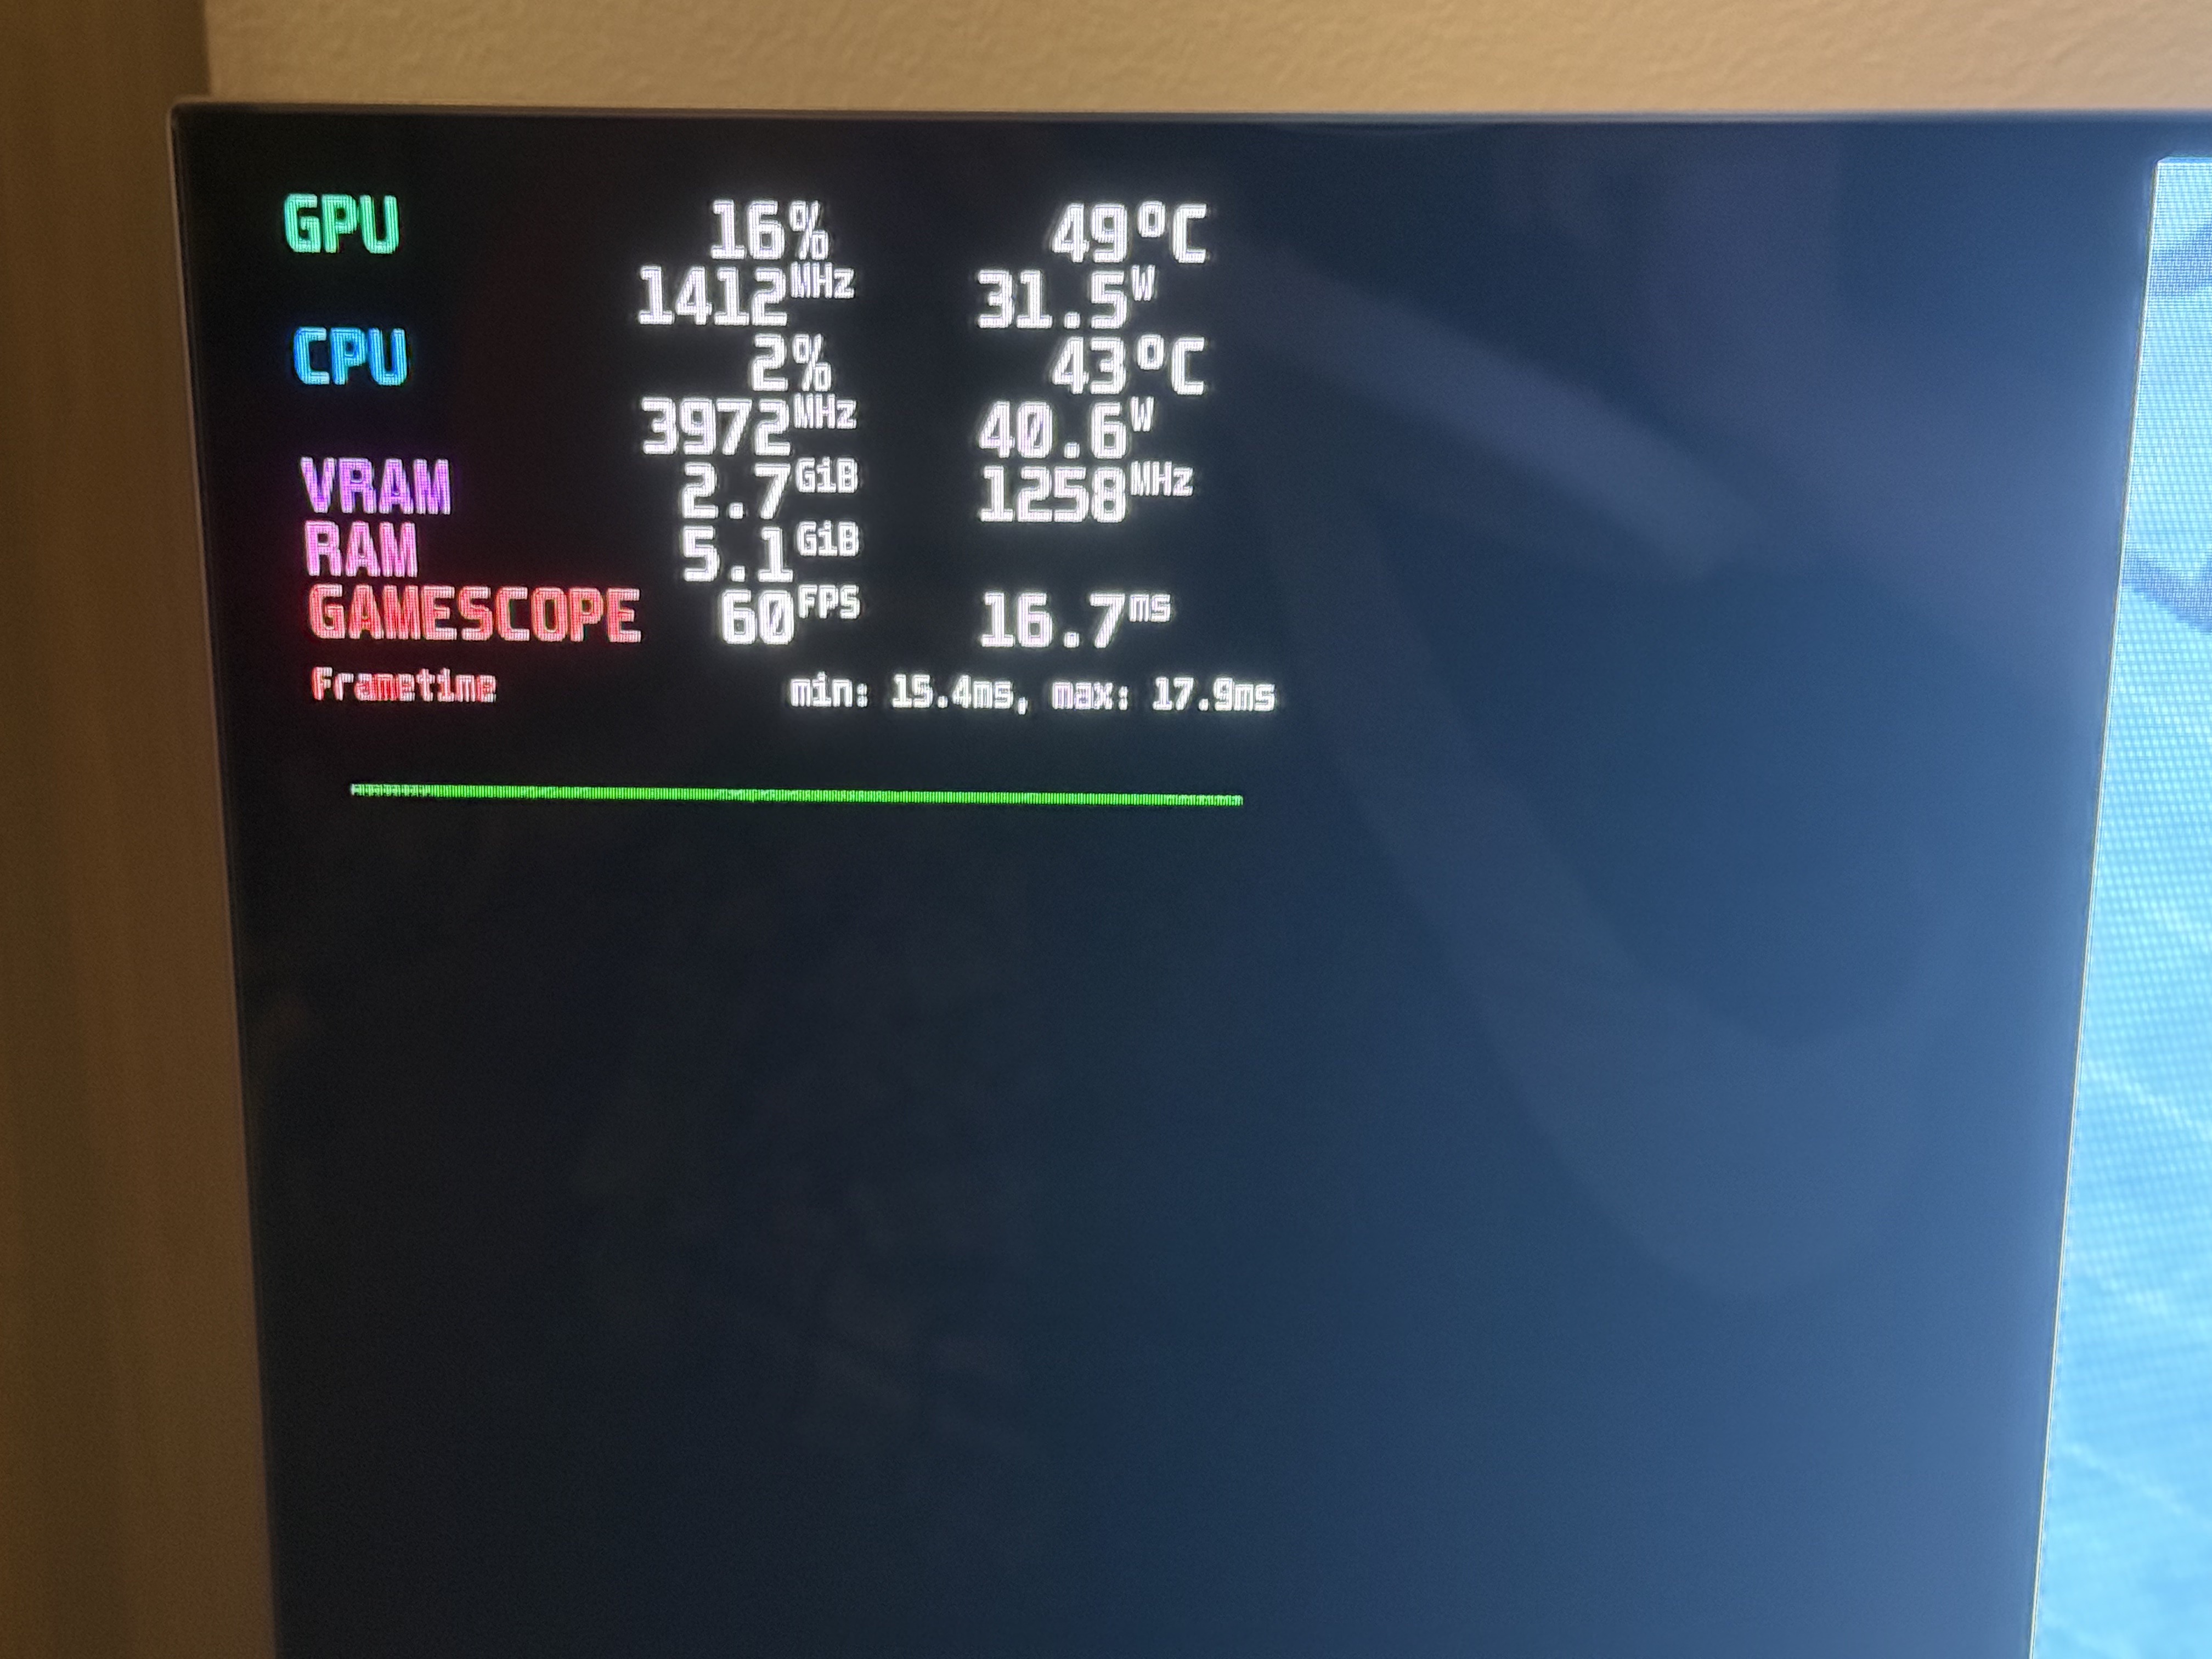
For one last test, I installed RetroDeck from Bazzite’s Bazaar app center. RetroDeck bundles retro console emulators, a cool menu UI based on EmulationStation, and all dependencies, in a single Flatpak application. It’s a verified package on Flathub, so you can install it on any distro with Flatpak access.
I fired up Super Smash Brothers Melee, one of my favorite GameCube classics, via the Dolphin emulator. As expected, it ran at a smooth 60 fps with no issues whatsoever.
Final Thoughts
This project was absolutely worth the effort. For around $600, I turned some last-gen components into a fantastic couch gaming machine. I’m supporting the push for Linux gaming, but I can still play everything from retro classics to triple-A behemoths without having to compromise much on anything.
There’s a couple TODOs I’d like to get to eventually:
- Figure out how to wake the machine from sleep with a controller. I can wake it with a wireless keyboard, but otherwise I have to get up and press the machine’s power button.
- Maybe explore adding HDMI CEC support somehow, so a single button press could fire up the PC and my TV at the same time!
If you liked this writeup, or have any questions, feel free to reach out and let me know! My GitHub and LinkedIn are linked from the home page, so feel free to send me a message on either one.